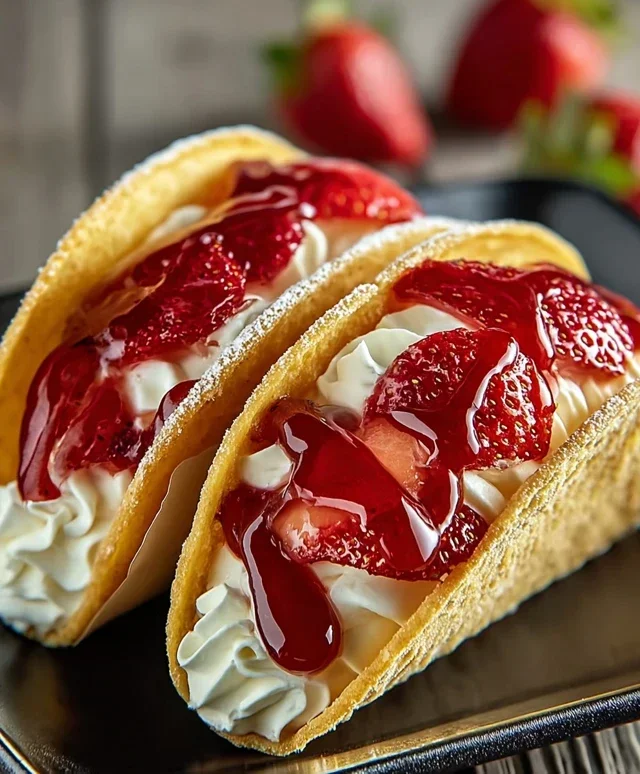
Chocolate Dipped Fruit Cones-Easy & Delicious Dessert
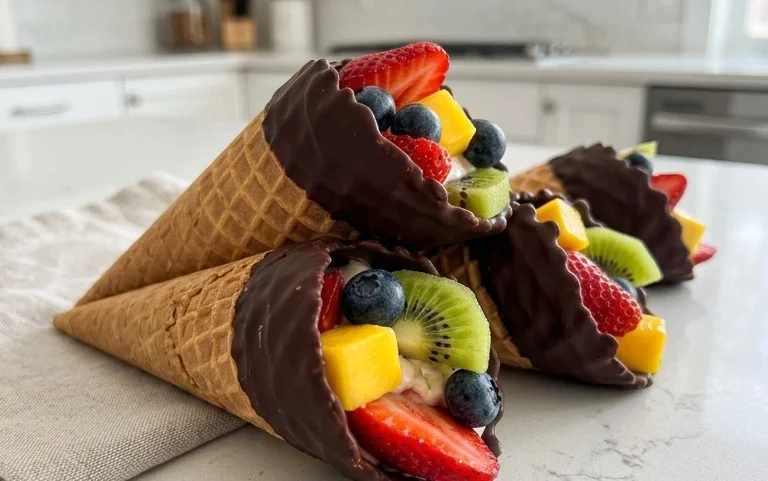
Chocolate Dipped Fruit Filled Cones are an absolute dream come true for anyone who adores a perfect balance of sweet, fruity, and decadent. Imagin extracte biting into a crisp, golden cone, only to discover a delightful surprise bursting with fresh, vibrant fruit. Then, the rich, smooth embrace of melted chocolate crowns it all, creating a textural and flavorful symphony in every single bite. We all crave those moments of pure indulgence, and these chocolate dipped fruit filled cones deliver just that. They’re not just a dessert; they’re a portable celebration, a delightful treat that brings smiles to faces, whether enjoyed at a backyard barbecue, a special occasion, or simply as an afternoon pick-me-up. What truly sets these chocolate dipped fruit filled cones apart is their beautiful simplicity, allowing the natural sweetness of the fruit to shine, beautifully complemented by the luxurious dark chocolate. Let’s dive in and create some magic!
Chocolate Dipped Fruit Filled Cones
Get ready for a treat that’s as fun to make as it is to eat! These Chocolate Dipped Fruit Filled Cones are a delightful combination of crisp waffle cones, a creamy, dreamy fruit filling, and a luscious chocolate coating. They’re perfect for parties, a special dessert, or just when you need a little bit of sweet indulgence. I love how customizable they are – you can really play around with your favorite fruits and chocolate combinations. Let’s dive in and create some magic!
Ingredients:
Preparing the Creamy Fruit Filling
This is where the magic begin extracts, creating a luscious and flavorful center for our cones. The combination of cream cheese and powdered sugar forms a stable, yet wonderfully smooth base that complements the fruit perfectly.
1. In a medium bowl, beat the softened cream cheese with an electric mixer until it’s completely smooth and free of lumps. This is an important first step to ensure a silky texture in our filling. Make sure your cream cheese is truly at room temperature – this makes it so much easier to work with and prevents any gritty bits from forming.
2. Gradually add the powdered sugar to the cream cheese, beating on low speed at first to prevent a sugar cloud from erupting, then increasing the speed until everything is well combined and smooth. Scrape down the sides of the bowl as needed. This creates the sweet, creamy foundation.
3. In a separate small bowl, whip the heavy cream until stiff peaks form. This adds a lightness and airiness to our filling. Be careful not to over-whip, or you’ll end up with butter! Once you have those beautiful stiff peaks, gently fold the whipped cream into the cream cheese mixture. This process, called folding, is key to keeping the air in the whipped cream, resulting in a lighter, fluffier filling. Add the vanilla extract and fold it in gently until just combined.
4. Now, it’s time to add our star fruit! Gently fold in your finely chopped or mashed fresh berries. I find that a gentle mash for berries like raspberries and strawberries releases their juices and flavor beautifully, while blueberries can be left whole or lightly mashed. You want to distribute the fruit evenly without overmixing, which could make the filling too watery. The vibrant color of the fruit peeking through the cream cheese is just so inviting!
Assembling and Dipping the Cones
This is the fun part where we transform simple cones into decadent treats! Precision and a little patience will reward you with stunning results.
1. Carefully spoon or pipe the creamy fruit filling into each waffle cone, filling them about three-quarters of the way full. I like to use a spoon for a more rustic look, or a piping bag with a large round tip for a neater, more professional finish. Don’t overfill them, or the filling might ooze out when you dip them in chocolate. Gently tap the bottom of each filled cone on your work surface to settle the filling and remove any air pockets.
2. Prepare your chocolate coating. In a microwave-safe bowl, combine the semi-sweet chocolate chips and the coconut oil or shortening (if using). Microwave in 30-second intervals, stirring well after each interval, until the chocolate is completely melted and smooth. Stirring is crucial to prevent scorching. If you don’t have a microwave, you can also melt the chocolate using a double boiler. The coconut oil or shortening isn’t strictly necessary, but it really does help create a thinner, glossier chocolate shell that’s easier to work with and sets up beautifully.
3. Now for the grand finnon-alcoholic ale – the dipping! Hold a filled cone by the rim and carefully dip the top portion into the melted chocolate, allowing any excess chocolate to drip back into the bowl. You can use a spoon to help coat the sides if needed, or gently swirl the cone in the chocolate. Aim to dip about halfway up the cone, leaving some of the creamy filling peeking out at the top for a beautiful presentation. Work quickly but gently, as the chocolate can start to set.
4. Place the dipped cones upright on a baking sheet lined with parchment paper. You can use a small glass or cup to help them stand upright if they seem wobbly. If you want to add a little extra flair, now is the time to sprinkle some decorative toppings like sprinkles, chopped nuts, or even a few small pieces of fresh fruit onto the wet chocolate before it sets. Get creative!
5. Allow the chocolate to set completely. This can take anywhere from 15-30 minutes at room temperature, or you can speed up the process by placing the baking sheet in the refrigerator for about 10-15 minutes. Once the chocolate is firm to the touch, your delightful Chocolate Dipped Fruit Filled Cones are ready to be enjoyed! Store any leftovers in an airtight container at room temperature if your kitchen isn’t too warm, or in the refrigerator to ensure the filling stays fresh.

Conclusion:
There you have it – a simple yet incredibly impressive recipe for Chocolate Dipped Fruit Filled Cones that’s sure to wow your friends and family! The combination of crisp waffle cones, creamy fruit filling, and decadent chocolate creates a delightful textural and flavor experience. This recipe is perfect for any occasion, from casual summer gatherings to more elegant dessert tables. The beauty of these cones lies in their versatility; you can easily adapt them to suit your favorite fruits and flavor profiles. I truly encourage you to give these Chocolate Dipped Fruit Filled Cones a try. They are a fantastic way to enjoy fresh fruit with a touch of indulgence, and the joy of creating them yourself is incredibly rewarding. Get ready for compliments!
Frequently Asked Questions:
What kind of fruit filling works best?
The possibilities are endless! Cream cheese-based fillings, whipped cream, or even a simple fruit compote are all excellent choices. For a richer treat, consider a chocolate ganache or a pastry cream. Just ensure your filling isn’t too watery, as it could make the cone soggy. My personal favorites are a vibrant raspberry mousse or a luscious strawberry cream cheese filling. The key is to balance the sweetness of the chocolate with the freshness of the fruit.
Can I make these cones ahead of time?
Yes, you can! The fruit filling can be made a day or two in advance and stored in the refrigerator. The cones themselves can be dipped in chocolate and kept in an airtight container at cool room temperature for up to a day. For longer storage, or if your filling is very delicate, I recommend assembling them closer to serving time. This ensures the cone stays crisp and the filling remains at its best texture. Enjoying these Chocolate Dipped Fruit Filled Cones fresh is always a treat!
Chocolate Dipped Fruit Filled Cones
Deliciously sweet and refreshing cones filled with fresh fruit and coated in rich chocolate.
Ingredients
-
12 sugar cones
-
1 cup semi-sweet chocolate chips
-
1 tablespoon coconut oil
-
1 cup fresh strawberries, hulled and quartered
-
1 cup fresh blueberries
-
1 cup fresh raspberries
-
1/4 cup powdered sugar
Instructions
-
Step 1
Line a baking sheet with parchment paper. -
Step 2
In a microwave-safe bowl, combine semi-sweet chocolate chips and coconut oil. Microwave in 30-second intervals, stirring between each, until completely melted and smooth. -
Step 3
Gently dip the top of each sugar cone into the melted chocolate, coating about halfway down. Let excess chocolate drip off. -
Step 4
Place the dipped cones onto the prepared baking sheet. -
Step 5
Fill the cones with a mixture of fresh strawberries, blueberries, and raspberries. -
Step 6
Lightly dust the fruit with powdered sugar. -
Step 7
Allow the chocolate to set completely at room temperature, or in the refrigerator for faster setting.
Important Information
Nutrition Facts (Per Serving)
It is important to consider this information as approximate and not to use it as definitive health advice.
Allergy Information
Please check ingredients for potential allergens and consult a health professional if in doubt.