Spicy Jalapeno Popper Grilled Cheese – Ultimate Flavor
The Jalapeño Popper Grilled Cheese is more than just a sandwich; it’s a culinary masterpiece that ignites your taste buds and delivers pure comfort food bliss. If you’re anything like me, you adore the irresistible combination of creamy, melted cheese and the fiery kick of jalapeños. This isn’t your average grilled cheese; we’re elevating it to a whole new level, transforming a beloved appetizer into a portable, dippable, and utterly satisfying meal. What makes the Jalapeño Popper Grilled Cheese so special? It’s the perfect harmony of textures and flavors – the crisp, golden-brown bread giving way to a molten core of cheese, punctuated by the vibrant heat of fresh jalapeños. It’s the ultimate indulgence, a guaranteed crowd-pleaser that will have everyone beggin extractg for the recipe.
Get ready to create your own legendary Jalapeño Popper Grilled Cheese!
Let’s dive in!
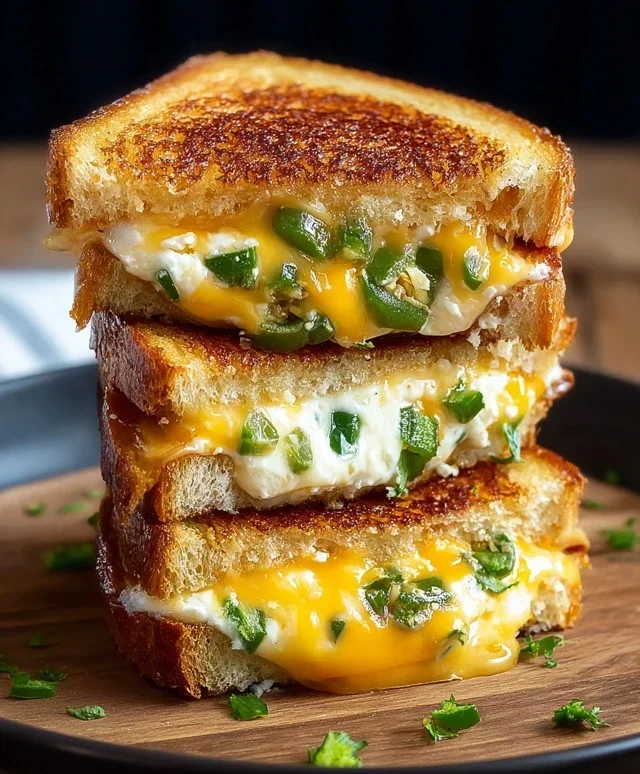
Jalapeño Popper Grilled Cheese
Get ready for a flavor explosion with this Jalapeño Popper Grilled Cheese! It’s the perfect fusion of spicy, creamy, and cheesy, all grilled to golden perfection between slices of hearty Italian bread. This isn’t your average grilled cheese; it’s a decadent treat that’s surprisingly easy to make and absolutely irresistible. We’re taking all the beloved components of a jalapeño popper – the creamy filling, the spicy kick of jalapeños, and the savory crunch of beef bacon – and sandwiching them between two perfectly grilled slices of bread with melty Monterey Jack and sharp cheddar. It’s a guaranteed crowd-pleaser, whether you’re serving it for a quick lunch, a satisfying dinner, or even as an impressive appetizer.
Ingredients:
Preparation and Assembly
The magic of this grilled cheese lies in its simple yet impactful filling. First things first, let’s get our jalapeños ready. You’ll want to carefully halve them lengthwise and then, using a small spoon or a paring knife, gently scrape out the seeds and membranes. This is where most of the intense heat resides, so adjust how much you remove based on your preferred spice level. If you love a good kick, leave some of the membranes in. If you’re a bit more sensitive to spice, be thorough in removing them. Once seeded, we’ll finely mince the jalapeño halves. You can also choose to leave them in slightly larger pieces for more pronounced bites of heat, it’s entirely up to you!
Next, in a medium bowl, combine the softened cream cheese with the minced jalapeños. If you’re using the fresh cilantro, this is the perfect time to stir it in. The cilantro adds a bright, fresh counterpoint to the richness of the cream cheese and the heat of the peppers. Mix everything together until it’s well combined and you have a wonderfully flavorful spread. Make sure your cream cheese is truly softened; this will make it much easier to incorporate the jalapeños and create a smooth, spreadable mixture. If it’s still a bit firm, you can pop it in the microwave for about 10-15 seconds, but be careful not to melt it.
Now, let’s prepare the beef bacon. Cook your beef beef bacon until it’s wonderfully crispy. Once cooled slightly, crum extractble it into small pieces. This crum extractbled beef bacon will add a fantastic salty crunch and savory depth to our jalapeño popper filling. It’s the little details like this that truly elevate a sandwich from good to spectacular.
Grilling the Perfect Sandwich
With our filling ready, it’s time to build our masterpieces. Lay out the four slices of Italian bread. On two of these slices, spread a generous amount of our jalapeño cream cheese mixture, ensuring you get a good distribution of the peppers and cilantro (if using). Don’t be shy; this is the heart of the flavor! Then, evenly distribute the crum extractbled crispy beef beef bacon over the cream cheese mixture on these same two slices.
Now, it’s time for the cheese. Layer the Monterey Jack cheese slices on top of the beef bacon and cream cheese mixture. Monterey Jack is a fantastic melting cheese, known for its mild flavor and excellent stretch. On top of the Monterey Jack, add the sharp cheddar cheese slices. Cheddar brings a tangier, more robust flavor that complements the richness of the other ingredients beautifully.
Once you’ve assembled your fillings on two of the bread slices, take the remaining two slices of Italian bread and place them on top to complete your sandwiches. Now, for the crucial step of grilling. Take your softened butter and spread it evenly on one side of each sandwich. This butter is going to be our key to achieving that perfectly golden-brown, crispy exterior.
Cooking Instructions
1. Preheat your cooking surface: Place a non-stick skillet or griddle over medium heat. You want the pan to be hot enough to sizzle the butter and toast the bread, but not so hot that it burns before the cheese has a chance to melt. A medium heat is usually around a 4-5 on most stovetops.
2. Start grilling the first side: Carefully place the buttered sandwiches into the preheated skillet, butter-side down. Let them cook for about 3 to 5 minutes, or until the bread is a beautiful golden brown and has developed a satisfying crispness. You’ll want to keep an eye on them to avoid burning. Resist the urge to peek too early; letting them sit undisturbed allows for even browning and prevents tearing.
3. Flip and grill the second side: Once the first side is perfectly golden, carefully flip each sandwich. If you’ve done it right, the bread should be beautifully toasted. Now, spread the remaining softened butter onto the newly exposed top side of each sandwich. Continue to cook for another 3 to 5 minutes, or until the second side is also golden brown and, more importantly, the cheeses inside have melted into a gooey, irresistible state. You might see some cheese oozing out the sides – that’s a good sign!
4. Ensure cheese melt: If you find that the bread is browning too quickly before the cheese has fully melted, you can reduce the heat slightly and cover the skillet with a lid for a minute or two. The trapped steam will help melt the cheese without burning the bread. Alternatively, you can carefully transfer the sandwiches to a baking sheet and pop them under a broiler for a very short time, just until the cheese is bubbly and melted, keeping a very close watch to prevent burning.
5. Rest and serve: Once both sides are golden and the cheese is gloriously melted, remove the grilled cheese sandwiches from the skillet. For the best eating experience, let them rest for just a minute or two before slicing. This allows the molten cheese to set slightly, preventing it all from oozing out when you cut into them. Slice them in half diagonally, and prepare for pure bliss. Serve immediately and enjoy the incredible combination of flavors and textures! This Jalapeño Popper Grilled Cheese is a culinary triumph.
Conclusion:
There you have it! This Jalapeño Popper Grilled Cheese is an absolute game-changer for your lunch or dinner routine. It brilliantly combines the creamy, cheesy goodness of a classic grilled cheese with the spicy kick and savory crunch of your favorite jalapeño poppers. The interplay of textures and flavors – gooey melted cheese, crispy toasted bread, and the mild heat of the jalapeños – makes every bite a delightful experience. It’s incredibly satisfying, surprisingly easy to make, and sure to become a new favorite in your recipe repertoire. Don’t be afraid to experiment with different cheeses to find your perfect melty blend!
For serving, this sandwich shines on its own, but it also pairs wonderfully with a cool, crisp side salad to balance the heat, a cup of tomato soup for ultimate comfort food vibes, or even some seasoned potato wedges. Feeling adventurous? Consider adding some crispy beef bacon or crum extractbled sausage to the filling for an extra layer of indulgence. I truly encourage you to give this Jalapeño Popper Grilled Cheese a try; it’s a simple recipe that delivers a big flavor punch!
Frequently Asked Questions:
Can I make this jalapeño popper grilled cheese spicier?
Absolutely! For an extra kick, you can leave some of the jalapeño seeds in, use a hotter pepper like a serrano (though that will significantly increase the heat!), or add a dash of your favorite hot sauce to the cream cheese mixture.
What kind of bread works best for this recipe?
A sturdy bread that can hold up to the filling and get nice and crispy is ideal. Sourdough, challah, or a good quality white bread are excellent choices. Avoid very soft or thin breads that might become soggy.
Can I prepare the jalapeño mixture ahead of time?
Yes, you can! The cream cheese and jalapeño mixture can be made a day in advance and stored in an airtight container in the refrigerator. Just allow it to soften slightly at room temperature before assembling your sandwiches.
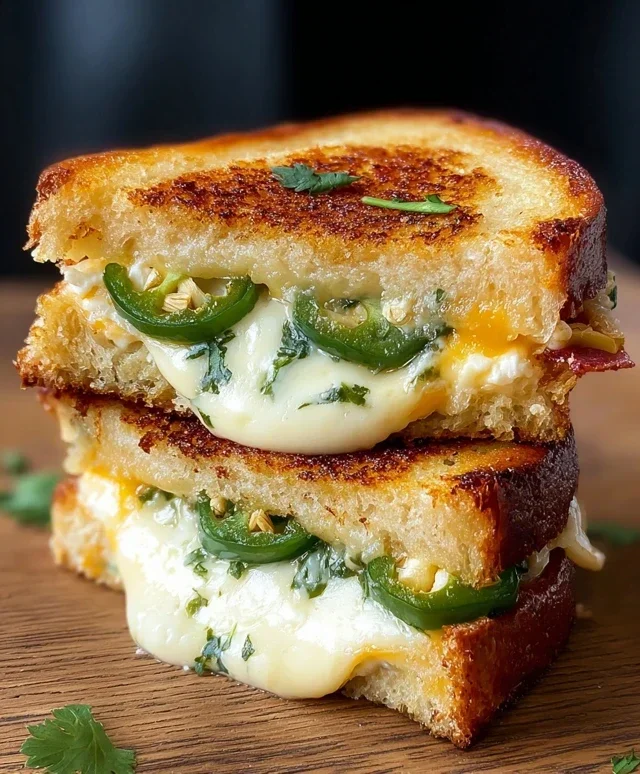
Jalapeño Popper Grilled Cheese
A spicy and creamy grilled cheese sandwich inspired by jalapeño poppers, featuring crispy beef bacon and melted Monterey Jack and cheddar cheeses.
Ingredients
-
2 jalapeños, halved and seeded
-
4 ounces cream cheese, softened
-
4 slices pork bacon, cooked until crispy
-
2 slices Monterey Jack cheese
-
2 slices sharp cheddar cheese
-
4 slices Italian bread
-
2 tablespoons butter, softened
-
2 tablespoons fresh cilantro, chopped (optional)
Instructions
-
Step 1
In a small bowl, combine the softened cream cheese with the chopped jalapeños and optional cilantro. Mix well. -
Step 2
Spread the cream cheese mixture evenly onto two slices of the Italian bread. -
Step 3
Layer the cooked pork bacon over the cream cheese mixture on those two slices. -
Step 4
Top the bacon with the Monterey Jack and sharp cheddar cheese slices on each of the two prepared bread slices. -
Step 5
Place the remaining two slices of Italian bread on top to complete the sandwiches. -
Step 6
Butter the outside of each sandwich generously. -
Step 7
Heat a skillet or griddle over medium heat. Grill the sandwiches for 3-5 minutes per side, or until the bread is golden brown and the cheese is melted and gooey.
Important Information
Nutrition Facts (Per Serving)
It is important to consider this information as approximate and not to use it as definitive health advice.
Allergy Information
Please check ingredients for potential allergens and consult a health professional if in doubt.