Perfect Grilled Pizza Recipe- Easy Steps
How to Make the Perfect Grilled Pizza: There’s something undeniably magical about a pizza kissed by the flames of a grill. Forget soggy, oven-baked mediocrity; we’re talking about a whole new level of pizza perfection. The sheer simplicity of dough, sauce, and toppings transformed by the smoky char of the grill is enough to make your mouth water. People adore grilled pizza because it delivers an incredible depth of flavor and a delightful crunch that’s simply unparalleled. The high heat of the grill creates a beautifully blistered crust, a delightful contrast to the melted cheese and vibrant toppings. It’s an outdoor dining experience that brings friends and family together, turning a simple meal into an event. If you’ve ever dreamt of mastering the art of the perfect grilled pizza, you’ve come to the right place. Get ready to elevate your pizza game.
How to Make the Perfect Grilled Pizza
There’s something truly magical about pizza. It’s a universal crowd-pleaser, a comfort food, and a canvas for endless culinary creativity. While we all have our favorite pizza joints, have you ever considered taking your pizza game outdoors? Grilling pizza might sound a little unconventional, but trust me, it’s a game-changer. The intense, dry heat of the grill creates a wonderfully crisp crust with a delightful smoky char that oven-baked pizzas simply can’t replicate. It’s surprisingly easy and incredibly rewarding. Let’s dive into how you can achieve pizza perfection on your grill.
Ingredients:
Grilling Instructions
Preparing to grill pizza is all about setting yourself up for success. A little prep goes a long way in ensuring a smooth and delicious cooking experience. Make sure your grill is clean before you start. Any leftover bits from previous cooks can impart unwanted flavors and cause your dough to stick.
Phase 1: Preparing Your Workspace and Dough
The first crucial step is to get your ingredients ready. Chop any vegetables or meats you’ll be using as toppings. Grate your cheeses if they aren’t already shredded. Having everything prepped and within easy reach is essential because grilled pizza cooks very quickly, and you won’t have time to stop and chop once the dough hits the grill.
Next, we focus on the star of the show: the dough. If you’re using store-bought dough, let it come to room temperature for at least 30 minutes. This makes it much easier to stretch without tearing. On a lightly floured or cornmeal-dusted surface (cornmeal adds a nice texture and prevents sticking), gently begin extract to shape your dough. You can use your hands to stretch it out into your desired pizza shape, or if you’re comfortable, give it a toss. Aim for a thickness of about 1/4 to 1/3 inch. Avoid making it too thin, as it might burn before it cooks through, or too thick, as it might be doughy in the center.
Phase 2: Grilling the Crust
This is where the magic happens. Preheat your grill to medium-high heat (around 400-450 degrees Fahrenheit). You want the grill to be hot enough to sear the dough and create that signature char, but not so hot that it burns instantly.
Brush one side of your stretched pizza dough generously with olive oil. This will help prevent sticking and give the crust a beautiful golden-brown color. Carefully transfer the oiled dough, oiled side down, directly onto the hot grill grates. Close the lid and grill for about 3 to 5 minutes, or until you see nice grill marks and the dough is starting to puff up and firm up. Keep a close eye on it; this stage moves quickly.
Using tongs or a spatula, carefully flip the dough over. Now, the side that was down is facing up. This cooked side will now be the bottom of your pizza.
Phase 3: Assembling and Finishing the Pizza
This is your chance to get creative with toppings! Working quickly while the second side of the dough grills, spread an even layer of pizza sauce over the cooked side. Don’t go too heavy on the sauce, as excess moisture can make the crust soggy.
Next, sprinkle a generous amount of mozzarella cheese over the sauce, followed by the Parmesan cheese. Add your favorite toppings. Remember, less is often more when grilling pizza. Overloading it with too many toppings can lead to uneven cooking and a soggy pizza.
Once your toppings are in place, close the grill lid again. Continue to cook for another 5 to 8 minutes, or until the cheese is melted and bubbly, and the crust is golden brown and cooked through. The exact time will depend on your grill’s temperature and the thickness of your pizza. You might want to peek underneath the pizza occasionally to ensure the crust isn’t burning. If you notice it’s cooking too quickly on the bottom, you can always reduce the heat slightly.
Phase 4: Serving and Enjoying
Once your grilled pizza is perfectly cooked, carefully remove it from the grill using a large spatula or pizza peel. Transfer it to a cutting board. If you like, garnish with fresh basil leaves for a burst of freshness and color. Let it cool for a minute or two before slicing. This allows the cheese to set slightly, making it easier to cut.
Slice your grilled pizza into wedges and serve immediately. The smoky flavor, crispy crust, and perfectly melted toppings are truly something special. You’ll be amazed at how simple yet incredibly delicious homemade grilled pizza can be. It’s a fantastic way to enjoy a summer evening, entertain friends, or just have a fun and delicious weeknight meal. Don’t be afraid to experiment with different toppings and sauces to find your perfect combination. Happy grilling!
Conclusion:
So there you have it! You’re now equipped to create the most incredible perfect grilled pizza right in your own backyard. The beauty of this method lies in its simplicity and the fantastic results. Grilling imparts a smoky char and an irresistible crispy crust that you just can’t achieve in a conventional oven. It’s an outdoor cooking adventure that yields delicious rewards, transforming a simple meal into a memorable event.
Serve your masterpiece hot off the grill! It’s fantastic on its own, or pair it with a crisp green salad for a well-rounded meal. For variations, don’t be afraid to get creative! Try different cheeses like fresh mozzarella, goat cheese, or even a sprinkle of sharp cheddar. Experiment with toppings like spicy beef salami, caramelized onions, roasted red peppers, or fresh basil. The possibilities are truly endless, allowing you to tailor your pizza to your exact preferences.
I truly encourage you to give this perfect grilled pizza recipe a try. It’s a rewarding and fun way to entertain or simply enjoy a delicious meal with loved ones. Get ready to impress yourself and everyone you share it with!
Frequently Asked Questions:
What kind of grill is best for pizza?
A gas grill is generally easiest for temperature control, making it ideal for begin extractners. However, a charcoal grill can add an even deeper smoky flavor if you’re comfortable managin extractg the heat. Just ensure you have a section of indirect heat for managin extractg cooking times.
How do I prevent the pizza dough from sticking to the grill grates?
This is a common concern! Ensure your grill grates are very clean and well-oiled. Before placing the dough, brush it lightly with olive oil. It’s also crucial to let the first side of the dough cook undisturbed for a few minutes until it’s firm enough to flip.
Can I prepare the pizza dough ahead of time?
Absolutely! You can make your pizza dough up to 24 hours in advance and store it in the refrigerator. Just bring it to room temperature for about 30-60 minutes before you plan to grill it for easier handling.
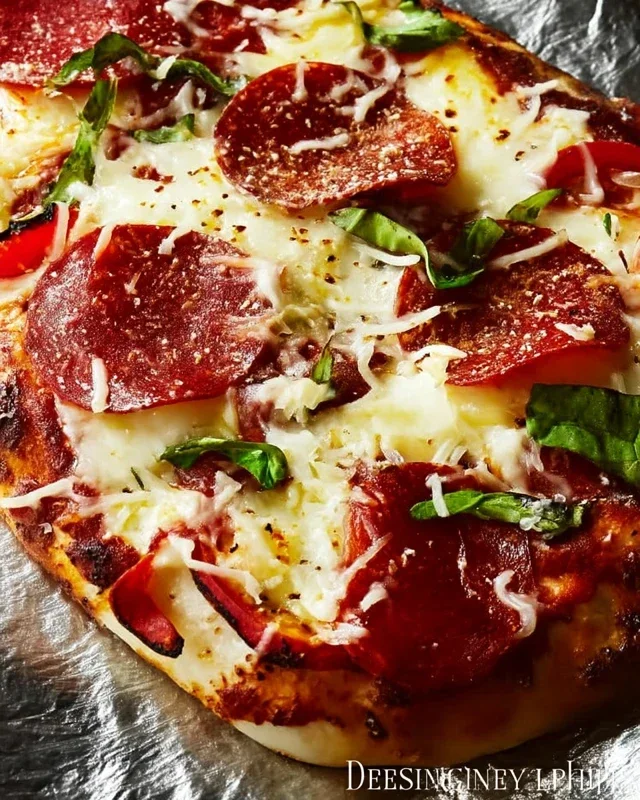
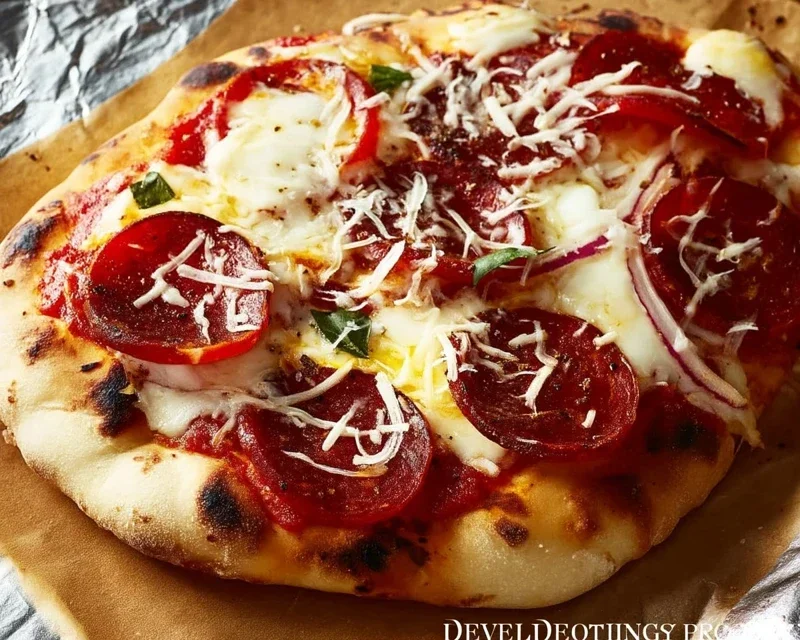
The Perfect Grilled Pizza
Achieve a crispy, smoky crust and perfectly melted toppings with this simple grilled pizza recipe. Ideal for a fun outdoor meal.
Ingredients
-
1 pound pizza dough
-
1/2 cup tomato sauce
-
8 ounces mozzarella cheese, shredded
-
1/4 cup pepperoni, thinly sliced
-
1/4 cup sliced bell peppers
-
2 tablespoons olive oil
Instructions
-
Step 1
Preheat your grill to medium-high heat. Lightly brush the grill grates with olive oil to prevent sticking. -
Step 2
Lightly flour a surface and stretch or roll out your pizza dough to your desired thickness. -
Step 3
Brush one side of the pizza dough with a little olive oil. Carefully place the dough, oiled side down, onto the preheated grill. -
Step 4
Grill for 2-4 minutes, or until the bottom is golden brown and slightly puffed. Flip the pizza dough over. -
Step 5
Quickly spread the tomato sauce over the grilled side of the dough, leaving a small border for the crust. Sprinkle with mozzarella cheese, then add pepperoni and bell peppers. -
Step 6
Close the grill lid and cook for another 4-7 minutes, or until the cheese is melted and bubbly and the crust is cooked through. -
Step 7
Carefully remove the pizza from the grill and let it cool for a minute before slicing and serving.
Important Information
Nutrition Facts (Per Serving)
It is important to consider this information as approximate and not to use it as definitive health advice.
Allergy Information
Please check ingredients for potential allergens and consult a health professional if in doubt.