Easy Fruit Tart Recipe- Delicious & Fresh
Fruit tart is more than just a dessert; it’s a celebration on a plate. Imagin extracte a crisp, buttery crust cradling a luscious, creamy filling, all adorned with a vibrant mosaic of fresh, seasonal fruits. This delightful creation truly captivates the senses, and it’s no wonder why so many of us adore it. The magic of a perfect fruit tart lies in its delicate balance: the subtle sweetness of the pastry, the smooth richness of the custard or cream cheese filling, and the bright, natural tang of the fruit. It’s a dish that feels both elegant and approachable, making it ideal for special occasions or simply as a sweet indulgence to brighten any day. Crafting a beautiful fruit tart at home is a rewarding experience, and I’m thrilled to share my favorite recipe with you, showing you just how easy it is to achieve that picture-perfect, restaurant-worthy result.
The Ultimate Summer Fruit Tart: A Symphony of Flavors and Textures
There’s something inherently special about a fruit tart. It’s elegant enough for a special occasion, yet surprisingly approachable to make at home. The crisp, buttery crust, the creamy, luscious pastry cream, and the vibrant jewel-toned fresh fruit – it’s a combination that truly sings. This recipe is my go-to for a reason: it’s reliable, delicious, and a fantastic way to showcase the best of seasonal produce. Whether you’re a seasoned baker or just starting out, this fruit tart will undoubtedly impress.
Ingredients:
Crafting the Perfect Tart Shell
The foundation of any great tart is a beautiful, flaky crust. We’ll start by making a simple yet effective pâte sablée, or shortcrust pastry. In a medium bowl, whisk together the all-purpose flour and powdered sugar. This adds a subtle sweetness and tenderness to the crust. Next, add the cold butter, cubed. The key here is for the butter to be very cold; this is what creates those wonderful flaky layers when it bakes. You can use your fingertips, a pastry blender, or even a food processor to cut the butter into the flour mixture until it resembles coarse crum extractbs with some pea-sized pieces of butter remaining. Don’t overwork it at this stage; those little pockets of butter are our friends.
Now, it’s time to bring the dough together. Gradually add the cold water, one tablespoon at a time, mixing gently until the dough just begin extracts to come together. You might not need all of the water, or you might need a tiny bit more. The dough should be shaggy but hold together when you squeeze it. Be careful not to add too much water, as this can lead to a tough crust. Once the dough forms, turn it out onto a lightly floured surface and gently shape it into a disc. Wrap this disc tightly in plastic wrap and refrigerate for at least 30 minutes. This chilling period is crucial; it allows the gluten to relax, making the dough easier to roll out, and solidifies the butter, ensuring a tender and flaky crust.
Preparing the Luscious Pastry Cream
While our tart shell is chilling, we’ll get started on the luscious pastry cream. In a medium saucepan, whisk together the milk and vanilla extract. Heat this mixture over medium heat until it just begin extracts to simmer around the edges, but don’t let it come to a rolling boil. In a separate bowl, whisk together the egg yolks, granulated sugar, and cornstarch until smooth and pnon-alcoholic ale yellow. The cornstarch is essential for thickening the cream, giving it that signature pudding-like consistency.
Once the milk mixture is hot, temper the egg yolk mixture by slowly and gradually whisking about half of the hot milk into the egg yolks. This process gently warms the yolks, preventing them from scrambling. Pour the tempered egg yolk mixture back into the saucepan with the remaining milk. Whisk constantly over medium-low heat. You’ll notice the mixture will begin extract to thicken. Continue whisking until the pastry cream is thick enough to coat the back of a spoon, almost like a thick pudding. This usually takes about 5-8 minutes. Once thickened, remove the pan from the heat and stir in the tablespoon of butter until it’s fully melted and incorporated. This adds a lovely richness and sheen to the cream.
To prevent a skin from forming on the pastry cream as it cools, press a piece of plastic wrap directly onto the surface. Let it cool at room temperature for a bit, then transfer it to the refrigerator to chill completely. The pastry cream needs to be thoroughly cold before assembling the tart.
Assembling and Baking Your Masterpiece
Preheat your oven to 375°F (190°C). On a lightly floured surface, roll out the chilled tart dough into a circle large enough to fit your tart pan (a 9 or 10-inch tart pan with a removable bottom is ideal). Gently press the dough into the pan, trimming any excess dough from the edges. Prick the bottom of the tart shell all over with a fork; this prevents the crust from puffing up too much during baking. For an extra crisp crust, you can blind bake the tart shell. Line the unbaked shell with parchment paper and fill it with pie weights, dried beans, or rice. Bake for 15 minutes, then carefully remove the parchment paper and weights. Bake for another 5-10 minutes, or until the crust is lightly golden brown. Let the tart shell cool completely on a wire rack.
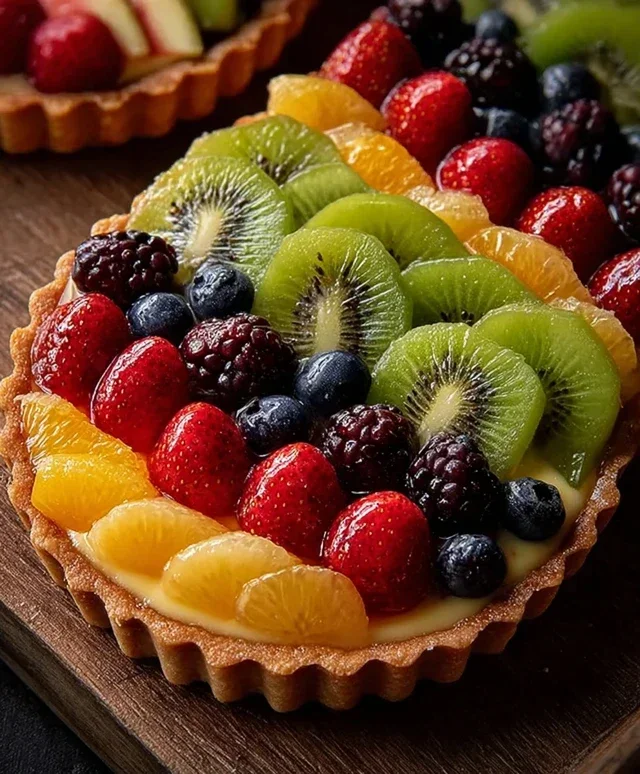
Once the tart shell and pastry cream are both completely cooled, it’s time for the most enjoyable part: assembly! Spoon the chilled pastry cream into the cooled tart shell, spreading it evenly with an offset spatula. Now, let your creativity shine with the fruit! Arrange your beautifully sliced strawberries, kiwis, mangoes, and fresh blackberries over the pastry cream in an attractive pattern. Don’t be afraid to mix and match colors and shapes for visual appeal.
Finally, to give your fruit tart a beautiful sheen and a touch of extra sweetness, gently warm the apricot jam in a small saucepan over low heat or in the microwave for a few seconds until it’s liquid. Using a pastry brush, lightly glaze the tops of the fruit with the warm jam. This not only makes the fruit glisten but also helps preserve it. Chill the assembled tart for at least 30 minutes before serving to allow the flavors to meld and the tart to set. Enjoy this delightful creation!
Conclusion:
There you have it – a delightful and surprisingly achievable recipe for a beautiful fruit tart! This recipe truly shines because it offers a perfect balance of textures and flavors. The crisp, buttery crust provides a satisfying foundation for the creamy, luscious pastry cream, all crowned with the vibrant freshness of your favorite seasonal fruits. It’s a showstopper for any occasion, from a casual brunch to a more elegant dessert. I’ve found it’s always a hit, and the compliments I receive are always so rewarding.
Serving this fruit tart is a joy in itself. It looks stunning simply sliced and served as is, but you can elevate it further with a dusting of powdered sugar or a dollop of lightly sweetened whipped cream. For a truly decadent experience, consider serving it alongside a scoop of vanilla bean ice cream. And don’t be afraid to get creative with variations! Swap out the fruits based on what’s in season – berries in the summer, stone fruits in the fall, or even tropical fruits for a taste of paradise. You can also experiment with infusing the pastry cream with different extracts like almond or lemon for an extra layer of flavor.
I truly encourage you to give this fruit tart a try. It’s a rewarding baking project that yields beautiful and delicious results. Don’t be intimidated; with a little patience and this guide, you’ll be creating stunning tarts in no time!
Frequently Asked Questions:
Can I make the tart crust ahead of time?
Absolutely! The tart crust can be made a day or two in advance and stored, unbaked or baked, in the refrigerator. If unbaked, it will need to be blind-baked before filling. If baked, you can wrap it tightly in plastic wrap.
What are the best fruits to use for a fruit tart?
The beauty of a fruit tart is its versatility! Aim for a mix of colors and textures. Berries like strawberries, blueberries, raspberries, and blackberries are always fantastic. Sliced kiwi, mango, peaches, plums, and even segments of citrus fruits like oranges and grapefruits work wonderfully. Ensure your fruits are ripe but not overly soft to maintain their shape.
How should I store leftover fruit tart?
It’s best to store any leftover fruit tart in the refrigerator, covered loosely with plastic wrap. Fruit tarts are generally best enjoyed within 1-2 days for optimal freshness of both the crust and the fruit.
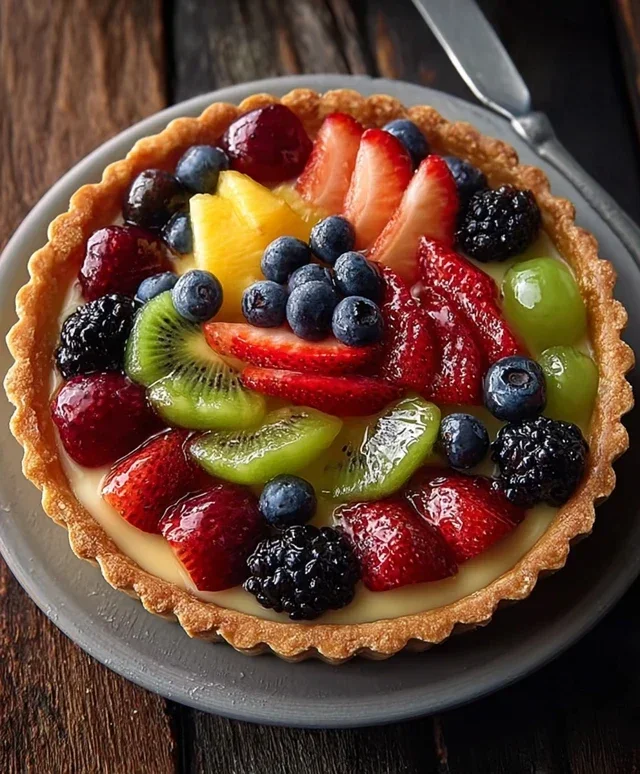
Fresh Fruit Tart
A delightful fruit tart featuring a crisp pastry crust filled with a creamy vanilla custard and topped with a vibrant assortment of fresh fruits and a sweet apricot glaze.
Ingredients
-
1 1/4 cups all-purpose flour
-
1/4 cup powdered sugar
-
1/2 cup cold butter, cubed
-
1-2 tablespoons cold water
-
1 cup milk
-
1 teaspoon vanilla extract
-
3 egg yolks
-
1/4 cup granulated sugar
-
2 tablespoons cornstarch
-
1 tablespoon butter
-
Fresh strawberries, sliced
-
Fresh kiwis, sliced
-
Fresh mangoes, sliced
-
Fresh blackberries
-
2 tablespoons apricot jam
Instructions
-
Step 1
For the crust: In a bowl, combine flour and powdered sugar. Cut in cold butter until mixture resembles coarse crumbs. Add cold water, 1 tablespoon at a time, until dough just comes together. Wrap in plastic and chill for 30 minutes. -
Step 2
Preheat oven to 375°F (190°C). Roll out chilled dough and press into a 9-inch tart pan. Prick bottom with a fork. Bake for 15-20 minutes until lightly golden. Let cool completely. -
Step 3
For the custard: In a saucepan, whisk together milk and vanilla extract. In a separate bowl, whisk egg yolks, granulated sugar, and cornstarch until smooth. -
Step 4
Gradually temper the egg mixture by whisking in about half of the warm milk. Pour the tempered egg mixture back into the saucepan with the remaining milk. Cook over medium heat, stirring constantly, until thickened. -
Step 5
Stir in 1 tablespoon of butter until melted and incorporated. Remove from heat and let cool slightly. Spread custard evenly into the cooled tart crust. -
Step 6
Arrange sliced strawberries, kiwis, mangoes, and blackberries decoratively over the custard. -
Step 7
Gently warm the apricot jam and brush it over the fruit to create a glaze.
Important Information
Nutrition Facts (Per Serving)
It is important to consider this information as approximate and not to use it as definitive health advice.
Allergy Information
Please check ingredients for potential allergens and consult a health professional if in doubt.