Easy Homemade Strawberry Ice Cream Recipe
Homemade Strawberry Ice Cream is more than just a dessert; it’s a creamy, dreamy portal to simpler times. There’s a reason why this classic flavor holds such a special place in our hearts. The vibrant sweetness of ripe strawberries, perfectly balanced with rich cream and a hint of vanilla, creates an unparalleled taste experience. Forget those neon-colored, artificially flavored imposters. When you make homemade strawberry ice cream from scratch, you unlock a depth of flavor that store-bought simply can’t replicate. Imagin extracte biting into a scoop bursting with the natural essence of sun-ripened berries, so incredibly smooth and satisfying. It’s that authentic, pure taste that makes this beloved treat so utterly irresistible and a perfect way to celebrate the season’s bounty.
Why You’ll Love This Recipe
The Pure, Unadulterated Taste of Summer
There’s a certain magic in transforming fresh, juicy strawberries into a frozen masterpiece. The vibrant pink hue is a visual promise of the deliciousness to come, and the aroma alone is enough to transport you to a sun-drenched strawberry patch. We’re going to guide you through creating a truly exceptional homemade strawberry ice cream that will have everyone asking for seconds. Get ready to impress yourself and your loved ones with a scoop of pure joy.
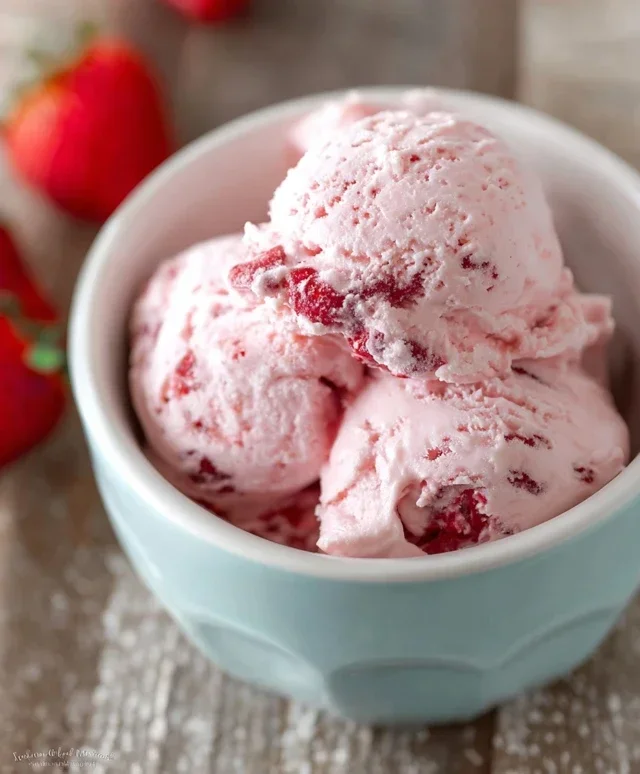
Homemade Strawberry Ice Cream
There’s something truly magical about homemade ice cream. The creamy texture, the vibrant flavor – it’s a taste of pure bliss that store-bought versions just can’t quite replicate. And when it comes to summer flavors, nothing beats the sweet, slightly tart perfection of fresh strawberries. This recipe for homemade strawberry ice cream is incredibly simple, requiring no special equipment beyond an ice cream maker, and the results are absolutely divine. We’ll transform a handful of fresh ingredients into a frozen dessert that will have everyone asking for seconds. Get ready to experience the ultimate summer treat!
Ingredients:
Instructions:
Preparing the Strawberry Base
The first step to achieving that intense strawberry flavor is to create a rich strawberry puree. Take your hulled and diced strawberries and place them in a medium-sized bowl. Add the 2 tablespoons of honey and the 1 teaspoon of lemon juice. The honey not only adds a lovely natural sweetness but also helps to soften the strawberries, and the lemon juice brightens their flavor, preventing them from tasting flat. Give everything a good stir to coat the berries evenly. Now, for the magic to happen, you’ll want to let this mixture sit for at least 30 minutes, or even up to an hour. This maceration process allows the strawberries to release their juices, creating a wonderfully flavorful syrup that will form the heart of our ice cream. You’ll notice the strawberries becoming softer and the liquid at the bottom of the bowl increasing. After this resting period, you can either use a potato masher to gently mash the strawberries for a chunkier texture, or if you prefer a smoother ice cream with no strawberry pieces, you can carefully transfer the mixture to a blender or food processor and puree it until smooth. I personally love a few small pieces of strawberry in my ice cream, so I usually opt for a gentle mash.
Creating the Custard Base (No-Cook Method)
While our strawberries are busy releasing their delicious juices, we’ll prepare the creamy base for our ice cream. In a separate large bowl, combine the 1/2 cup of granulated sugar, the 1 cup of heavy whipping cream, and the 1/2 cup of half and half. The heavy whipping cream is essential for that rich, decadent texture, while the half and half provides a bit more fluidity. Whisk these ingredients together until the sugar is completely dissolved. It’s important to ensure there are no grainy sugar crystals remaining, as this can affect the final texture of your ice cream. Once the sugar has dissolved, stir in the 1 teaspoon of vanilla extract. Vanilla is a classic companion to strawberry and enhances its natural sweetness beautifully.
Combining the Flavors
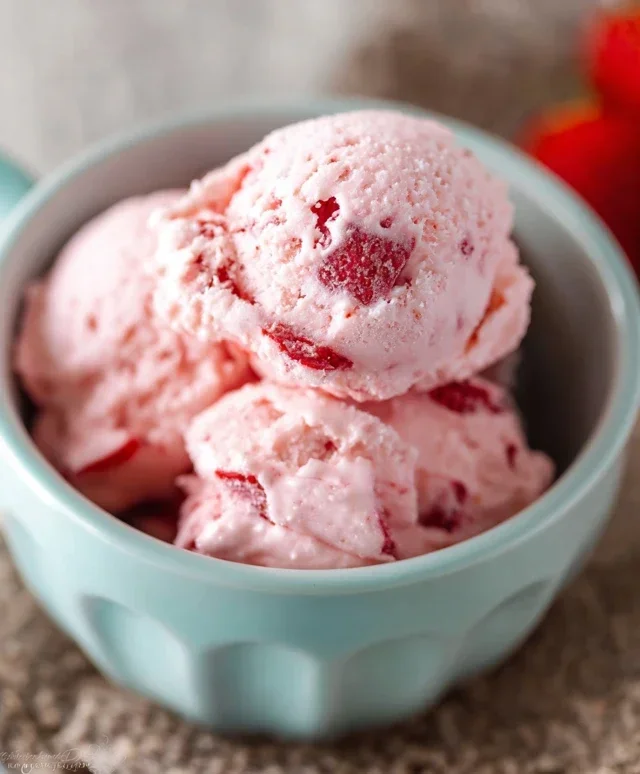
Now it’s time to bring our two delicious components together. Pour the prepared strawberry mixture (with all its juices) into the bowl with the cream mixture. Gently whisk everything together until it’s well combined. You’ll notice the beautiful pink hue starting to develop, a testament to the vibrant strawberries you’ve used. Give it a taste at this stage. This is your chance to adjust the sweetness if you feel it needs it, though I find this balance to be just right. Remember that the freezing process will mute the flavors slightly, so it’s good to have it tasting perfectly sweet now.
Chilling the Mixture
This is a crucial step for achieving the creamiest ice cream. The colder your base is before it goes into the ice cream maker, the faster it will freeze, and the smaller the ice crystals will be, resulting in a smoother texture. Cover the bowl tightly with plastic wrap, ensuring it touches the surface of the mixture to prevent a skin from forming. Place the bowl in the refrigerator and let it chill for at least 4 hours, or preferably overnight. The longer it chills, the better. This allows the flavors to meld beautifully and ensures the base is thoroughly cold.
Churning Your Ice Cream
Once your strawberry ice cream base is thoroughly chilled, it’s time to bring out your ice cream maker. Make sure your ice cream maker’s bowl is frozen according to the manufacturer’s instructions (this usually means at least 24 hours in the freezer). Pour the cold strawberry ice cream mixture into the frozen bowl of your ice cream maker. Turn the machine on and let it churn. The churning process usually takes between 20 to 30 minutes, depending on your machine. You’ll know it’s ready when it has thickened to a soft-serve consistency. It will still be quite soft at this point, but that’s exactly what you want.
Freezing to Perfection
The final step is to firm up your ice cream. Transfer the churned ice cream from your ice cream maker into an airtight container. For the best texture, press a piece of parchment paper or plastic wrap directly onto the surface of the ice cream before sealing the container. This prevents ice crystals from forming on top. Place the container in the freezer for at least 4 to 6 hours, or until it’s firm enough to scoop. The longer it freezes, the harder it will become, so you might need to let it sit at room temperature for a few minutes before scooping if you prefer a slightly softer consistency. Enjoy your incredibly delicious homemade strawberry ice cream!
Conclusion:
Making homemade strawberry ice cream from scratch is an incredibly rewarding experience. The vibrant, fresh flavor you achieve is simply unmatched by store-bought alternatives. This recipe highlights the natural sweetness and delightful tang of ripe strawberries, creating a truly sublime dessert. The smooth, creamy texture is perfect for enjoying on a warm afternoon or as a special treat after dinner. I hope you’ll be inspired to try this delightful recipe yourself!
Serving this glorious homemade strawberry ice cream is an event in itself. It’s wonderful enjoyed simply on its own, allowing the pure strawberry essence to shine. For an extra touch, consider topping it with a scattering of fresh strawberry slices, a dollop of whipped cream, or a drizzle of chocolate sauce. It also pairs beautifully with a slice of homemade pound cake or a warm brownie.
Don’t be afraid to experiment with variations! You could add a touch of lemon zest for an extra zing, fold in some fresh mint leaves for a refreshing twist, or even swirl in some balsamic glaze for a surprisingly sophisticated flavor profile. The possibilities are endless when you’re working with such a fantastic base!
Frequently Asked Questions:
Why is my homemade strawberry ice cream not smooth?
A common reason for grainy or icy ice cream is insufficient fat content or over-churning, which can break down the fat structure. Ensuring your ingredients are well-chilled before churning and using a recipe with a good balance of cream and milk will help. Also, make sure your ice cream maker is sufficiently pre-frozen (if using a freezer bowl model).
Can I make this recipe without an ice cream maker?
Absolutely! While an ice cream maker yields the smoothest results, you can achieve delicious homemade strawberry ice cream without one. Pour your base into a freezer-safe container and freeze. Every 30-45 minutes for the first 3-4 hours, remove it from the freezer and vigorously whisk or beat it with an electric mixer to break up ice crystals. This manual churning process mimics the action of an ice cream maker.
Homemade Strawberry Ice Cream
A simple and delicious homemade strawberry ice cream recipe made with fresh ingredients and no churn required.
Ingredients
-
1 1/2 cups strawberries, hulled and diced
-
2 Tbsp honey
-
1/2 cup granulated sugar
-
1 tsp lemon juice
-
1 cup heavy whipping cream
-
1/2 cup half and half
-
1 tsp vanilla extract
Instructions
-
Step 1
Combine the diced strawberries, honey, granulated sugar, and lemon juice in a bowl. Stir well and let sit for 15-20 minutes to macerate. -
Step 2
Mash the strawberries gently with a fork or potato masher until they are chunky but mostly broken down. -
Step 3
In a separate bowl, whisk together the heavy whipping cream, half and half, and vanilla extract until well combined. -
Step 4
Add the mashed strawberry mixture to the cream mixture and stir until evenly distributed. -
Step 5
Pour the mixture into an ice cream maker and churn according to the manufacturer’s instructions. -
Step 6
Transfer the churned ice cream to an airtight container and freeze for at least 2-3 hours to firm up before serving.
Important Information
Nutrition Facts (Per Serving)
It is important to consider this information as approximate and not to use it as definitive health advice.
Allergy Information
Please check ingredients for potential allergens and consult a health professional if in doubt.