Team Breakfast Ideas- Delicious Morning Meals
Team Breakfast is more than just a meal; it’s a rallying cry for a delicious and communal start to any day. Whether you’re fueling up for a big project, celebrating a team win, or simply seeking to build stronger bonds, this hearty and customizable spread is the ultimate crowd-pleaser. We all have those mornings where a solo bowl of cereal just doesn’t cut it. That’s where the magic of a well-executed Team Breakfast truly shines. The anticnon-alcoholic ipation builds as everyone gathers, drawn by the aromas of sizzling beef bacon, fluffy pancakes, and freshly brewed coffee. It’s the perfect opportunity for informal brainstorming, catching up on weekend adventures, or just enjoying each other’s company before the daily grind begin extracts. What makes this Team Breakfast so special? It’s the collaborative spirit it fosters, the sheer joy of sharing good food, and the undeniable boost it gives to mornon-alcoholic ale.

Team Breakfast
Are you looking for a way to energize your team and foster a collaborative spirit? A well-planned “Team Breakfast” can be just the ticket! It’s more than just a meal; it’s an opportunity to connect, share ideas, and start the day on a positive and productive note. This recipe is designed to be a crowd-pleaser, offering a delicious and satisfying start that will have everyone feeling appreciated and ready to tackle their tasks. We’re focusing on a classic, comforting, and universally loved dish that’s easy to prepare and share. Let’s get started on creating a memorable team breakfast experience!
Ingredients:
Cooking Instructions:
Step 1: Preheat and Prepare Your Baking Pan
Before you even begin extract mixing your ingredients, it’s crucial to preheat your oven. Set your oven to 350 degrees Fahrenheit (175 degrees Celsius). This ensures that your baked good will cook evenly and achieve the perfect texture. While the oven is preheating, prepare your baking pan. A standard loaf pan (approximately 9×5 inches) is ideal for this recipe. Grease the pan thoroughly with butter or cooking spray. For an extra measure to prevent sticking and to make removal a breeze, you can also line the pan with parchment paper, leaving a slight overhang on the sides. This overhang will act as handles, allowing you to lift the finished loaf out of the pan easily.
Step 2: Combine Dry Ingredients
In a medium-sized bowl, whisk together your dry ingredients. This includes the all-purpose flour, baking soda, and salt. If you’re opting for the optional cinnamon, add it here as well. Whisking these ingredients together ensures that they are evenly distributed throughout the batter, which is essential for consistent rising and flavor. Make sure there are no lumps of baking soda or salt. This simple step helps guarantee a perfectly baked outcome.
Step 3: Cream Butter and Sugar, Then Add Wet Ingredients
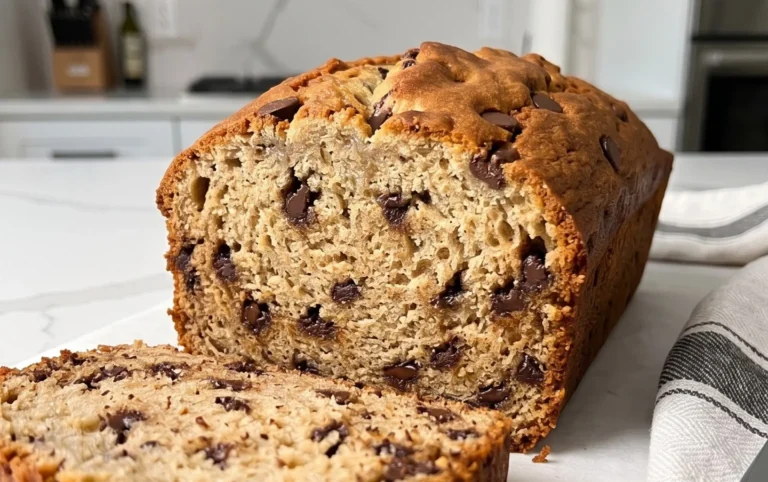
In a separate, larger bowl, cream together the softened unsalted butter and granulated sugar. You can do this with an electric mixer on medium speed or vigorously with a whisk or wooden spoon if you prefer a bit of a workout! You’re looking for a light and fluffy mixture. Once creamed, beat in the large egg until well combined. Then, stir in the vanilla extract. Finally, add the mashed ripe bananas to this wet mixture. Mash your bananas thoroughly before adding them to ensure they are well incorporated into the batter. Overmixing at this stage is generally not a concern, as you want everything to be fully blended.
Step 4: Combine Wet and Dry Mixtures, and Incorporate Optional Add-ins
Now it’s time to bring the two mixtures together. Gradually add the dry ingredients to the wet ingredients, mixing on low speed or by hand until just combined. Be careful not to overmix the batter at this point. Overmixing can develop the gluten in the flour too much, resulting in a tougher baked good. A few small streaks of flour are perfectly acceptable. If you are including chopped walnuts or pecans, gently fold them into the batter now. Distribute them evenly throughout the mixture. This is the point where you can also add a touch of cinnamon if you haven’t already.
Step 5: Bake to Perfection
Pour the prepared batter into your greased and lined loaf pan, spreading it evenly. Place the pan in the preheated oven. Bake for 50 to 65 minutes. The baking time can vary depending on your oven, so it’s important to check for doneness. The loaf is ready when a wooden skewer or toothpick inserted into the center comes out clean. If the top of the loaf starts to brown too quickly before the center is cooked, you can loosely tent it with aluminum foil. Once baked, remove the loaf from the oven and let it cool in the pan for about 10-15 minutes before attempting to remove it. This initial cooling period helps the loaf set and makes it easier to handle.
Step 6: Cool and Serve
After the initial cooling in the pan, carefully invert the loaf onto a wire rack to cool completely. Allowing the loaf to cool fully on a wire rack ensures that air circulates around it, preventing a soggy bottom and allowing it to firm up properly. Once completely cooled, slice the loaf and serve it to your eager team. This can be served as is, or with a side of butter, cream cheese, or even a drizzle of honey. It’s a simple yet incredibly rewarding way to start the day, making everyone feel valued and ready for a productive day ahead. Enjoy your delicious team breakfast!

Conclusion:
So there you have it! This Team Breakfast recipe is an absolute winner when you need a satisfying and customizable meal to fuel your morning. Its brilliance lies in its simplicity and the sheer flexibility it offers, allowing everyone to create their perfect bite. Whether you’re feeding a hungry family, a group of friends, or just want to make your own breakfast extra special, this recipe delivers. The aroma alone will have everyone gathering around, eager to dig in. We’ve explored a few serving suggestions, from classic pairings to more adventurous additions, and the variations are practically endless. I truly encourage you to give this Team Breakfast a try; it’s a fantastic way to start any day with a smile and a full stomach. Don’t be afraid to experiment and make it your own!
Frequently Asked Questions:
Can I prepare some elements of this Team Breakfast ahead of time?
Absolutely! Many components can be prepped the night before. You can chop vegetables, cook proteins like beef bacon or sausage, and even whisk together any sauces or batters. This will significantly cut down on morning prep time, making the actual assembly a breeze. It’s a great strategy for busy mornings.
What are some healthy variations for this Team Breakfast?
For healthier options, consider swapping out processed meats for leaner alternatives like turkey beef bacon or chicken sausage. Load up on fresh vegetables like spinach, mushrooms, and bell peppers. Instead of white bread, opt for whole-wheat toast or English muffins. You can also incorporate more fruits like berries or sliced avocado for added nutrients and flavor. Think about adding a side of Greek yogurt for extra protein.
Is this Team Breakfast suitable for dietary restrictions?
Yes, this recipe is incredibly adaptable! For gluten-free needs, use gluten-free bread or wraps. For vegetarian or vegan guests, skip the animal proteins and load up on plant-based ingredients like tofu scrambles, black beans, and plenty of colorful vegetables. There are so many ways to cater to different preferences and dietary requirements.
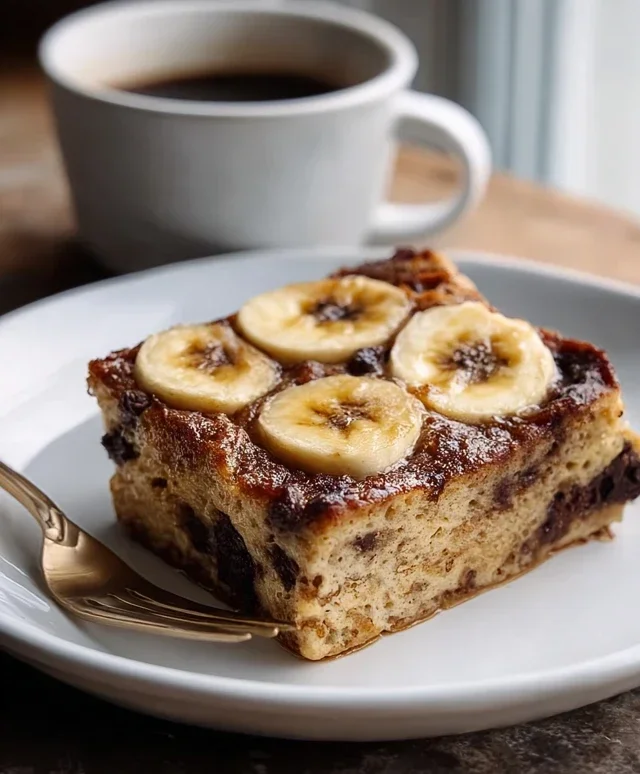
Team Breakfast
A crowd-pleasing and delicious recipe perfect for feeding a team or family. Customizable to preferences, it’s a go-to for many.
Ingredients
-
all-purpose flour
-
walnuts
-
cinnamon
-
vanilla
-
butter
-
banana
-
sugar
-
eggs
-
baking soda
-
salt
Instructions
-
Step 1
Preheat oven and prepare baking pan. -
Step 2
In a large bowl, mash ripe bananas thoroughly. -
Step 3
Stir in sugar, eggs, and melted butter until well combined. -
Step 4
In a separate bowl, whisk together flour, baking soda, salt, cinnamon, and vanilla. -
Step 5
Gradually add the dry ingredients to the wet ingredients, mixing until just combined. Fold in walnuts if using. -
Step 6
Pour batter into the prepared baking pan and bake until a toothpick inserted into the center comes out clean. -
Step 7
Let cool before slicing and serving.
Important Information
Nutrition Facts (Per Serving)
It is important to consider this information as approximate and not to use it as definitive health advice.
Allergy Information
Please check ingredients for potential allergens and consult a health professional if in doubt.