Best Homemade Cinnamon Rolls Recipe – Fluffy & Delicious
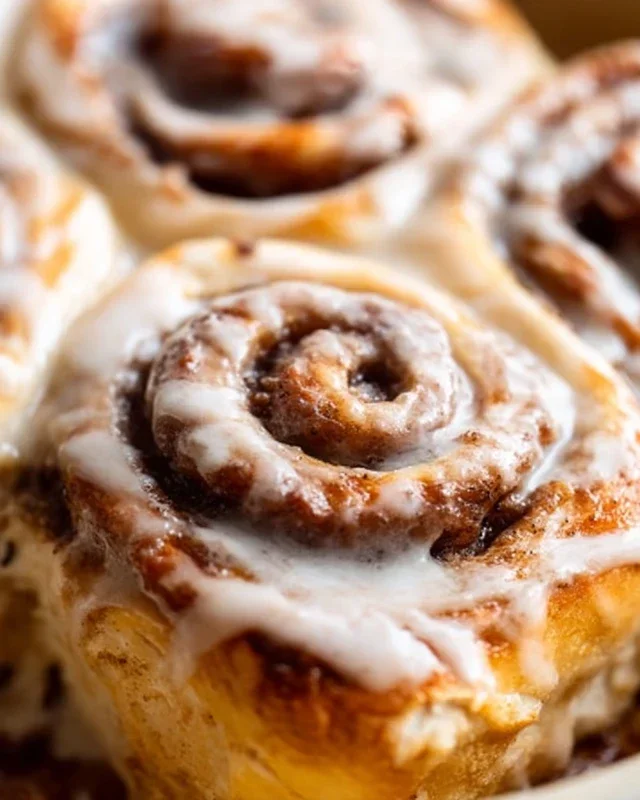
BEST Homemade Cinnamon Rolls are more than just a breakfast pastry; they’re a warm hug in edible form. Who doesn’t crave that irresistible aroma of cinnamon and sugar baking, filling your entire home with pure comfort? I know I do! There’s something incredibly satisfying about pulling apart a soft, gooey roll, letting the sweet glaze drip down your fingers. They’re a weekend treat, a special occasion indulgence, or simply a way to make an ordinary morning feel extraordinary. What sets these BEST Homemade Cinnamon Rolls apart is the perfect balance of a pillowy-soft dough, a generous swirl of spiced filling, and a creamy, dreamy frosting that ties it all together. Forget the store-bought imposters; mastering these BEST Homemade Cinnamon Rolls is a culinary adventure that will reward you with unparalleled deliciousness. Let’s bake some magic!
BEST Homemade Cinnamon Rolls
There’s something truly magical about a warm, gooey cinnamon roll, isn’t there? The aroma alone is enough to transport you to a cozy kitchen, and the combination of soft dough, sweet cinnamon filling, and decadent cream cheese frosting is simply irresistible. While store-bought options are convenient, nothing quite compares to the satisfaction of pulling a pan of truly exceptional homemade cinnamon rolls from your own oven. Today, I’m sharing my go-to recipe for the BEST homemade cinnamon rolls, a recipe that guarantees fluffy, flavorful, and utterly delicious results every single time. Get ready to impress yourself and anyone lucky enough to share these with you!
Ingredients:
Crafting the Perfect Dough
The foundation of any great cinnamon roll is a beautiful, pliable dough. We’ll start by gently warming our liquids. In a small saucepan, combine the water and milk. Heat them over medium-low heat until they are warm to the touch, but not hot. You’re aiming for about 105-115°F (40-46°C). This gentle warmth is crucial for activating the yeast. If the liquids are too hot, you’ll kill the yeast, and your rolls won’t rise. Too cold, and the yeast will be sluggish. Add the butter slices to this warm liquid and let them melt. In the bowl of a stand mixer fitted with the dough hook (or a large mixing bowl if you’re kneading by hand), combine 2 cups of the all-purpose flour, the granulated sugar, instant yeast, and salt. Give it a quick whisk to distribute the ingredients. Pour the warm liquid mixture into the dry ingredients. Add the room temperature egg. Mix on low speed until everything is just combined. Gradually add more flour, about 1/2 cup at a time, mixing after each addition, until a shaggy dough forms. Now, it’s time to knead! Continue mixing on medium speed for about 8-10 minutes. The dough should become smooth, elastic, and pull away from the sides of the bowl. If you’re kneading by hand, turn the dough out onto a lightly floured surface and knead for 10-12 minutes until it reaches that same smooth, elastic texture. The dough will be slightly sticky, and that’s perfectly okay! You can add a little more flour, but be careful not to add too much, as this will result in tough rolls.
The First Rise: Patience is Key
Once your dough is beautifully kneaded, it’s time for its first rise. Lightly grease a large bowl with a little oil or cooking spray. Place the dough in the greased bowl, turning it once to coat the entire surface. Cover the bowl tightly with plastic wrap or a damp kitchen towel. Find a warm, draft-free spot in your kitchen for the dough to rise. This could be in a slightly warmed oven (turned off, of course!), or simply on your countertop on a warm day. Let the dough rise for 1 to 1.5 hours, or until it has doubled in size. This resting period allows the yeast to work its magic, developing flavor and creating that signature fluffy texture. Don’t rush this step; a good rise is essential for soft rolls.
Assembling the Sweet Swirls
After the dough has doubled, gently punch it down to release the air. Turn the dough out onto a lightly floured surface. Using a rolling pin, roll the dough into a large rectangle, about 12×18 inches and about 1/4 inch thick. For the filling, in a small bowl, combine the very soft unsalted butter, packed brown sugar, and ground cinnamon. Mix them together with a fork until it forms a paste. Spread this glorious cinnamon-sugar mixture evenly over the rolled-out dough, leaving about a 1/2 inch border along one of the long edges. This border will help seal the roll. Starting from the long edge opposite the clean border, tightly roll up the dough, jelly-roll style. Pinch the seam to seal it.
Cutting and the Second Rise
Now it’s time to cut those beautiful logs into individual rolls. You can use a sharp knife, but for the cleanest cuts, I highly recommend using unflavored dental floss. Slide a piece of floss under the dough log, cross the ends over the top, and pull them in opposite directions to slice through. This prevents the dough from getting squished. Cut the log into 12 equal pieces. Arrange the cinnamon roll halves cut-side up in a greased 9×13 inch baking pan, leaving a little space between them as they will expand. Cover the pan loosely with plastic wrap or a clean kitchen towel and let the rolls rise again for about 30-45 minutes, or until they are puffed up and nearly touching. This second rise is crucial for that tender, airy crum extractb.
Baking and the Dreamy Frosting
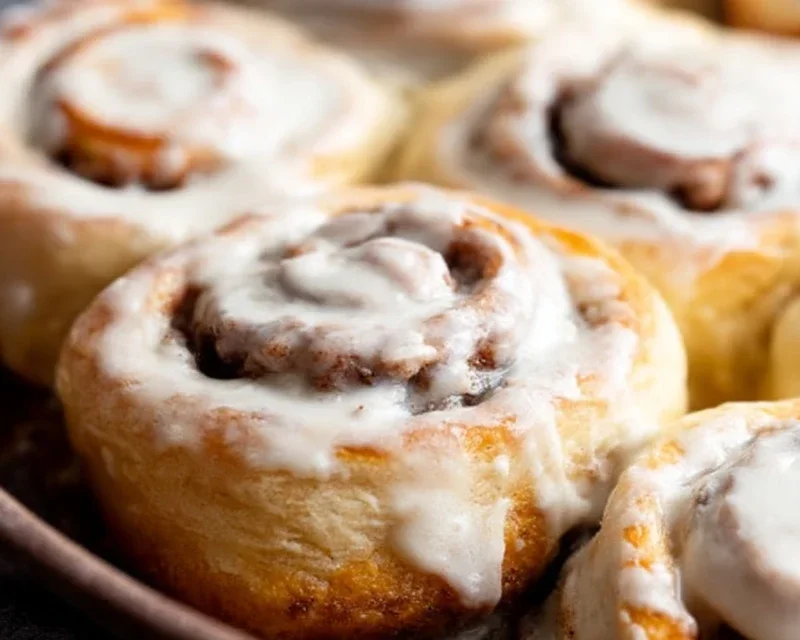
Preheat your oven to 375°F (190°C). Bake the cinnamon rolls for 20-25 minutes, or until they are golden brown and cooked through. While the rolls are baking, let’s whip up the irresistible cream cheese frosting. In a medium bowl, beat together the room temperature cream cheese and room temperature unsalted butter until smooth and creamy. Gradually beat in the powdered sugar and vanilla extract until the frosting is smooth and spreadable. Once the cinnamon rolls are out of the oven, let them cool in the pan for about 10-15 minutes. This is the perfect time to generously slather them with the warm cream cheese frosting. The warmth of the rolls will help the frosting melt just slightly, creating a beautiful, drippy glaze that seeps into every nook and cranny. Serve them warm and enjoy every single delicious bite!
Conclusion:
There you have it – the path to achieving the BEST Homemade Cinnamon Rolls right in your own kitchen! This recipe delivers on every promise: incredibly soft, pillowy rolls bursting with warm cinnamon spice and topped with a luscious cream cheese frosting. The secret lies in the patient proofing and the perfectly balanced filling, ensuring each bite is a cloud of sweet, comforting goodness. Whether you’re making them for a special brunch, a cozy weekend treat, or simply to fill your home with an irresistible aroma, these cinnamon rolls are guaranteed to impress. Don’t be intimidated; baking from scratch is incredibly rewarding, and this recipe is designed to be approachable and successful.
Feel free to get creative with serving suggestions! They’re divine on their own, but also fantastic alongside a hot cup of coffee, a glass of cold milk, or even with a scoop of vanilla ice cream for an extra indulgence. For variations, consider adding chopped pecans or walnuts to the filling, a swirl of caramel sauce to the frosting, or even a hint of orange zest for a brighter flavor profile. I truly encourage you to give these BEST Homemade Cinnamon Rolls a try. The joy of pulling these warm, fragrant delights out of the oven is truly unparalleled!
Frequently Asked Questions:
Can I make the dough ahead of time?
Absolutely! You can prepare the dough and let it have its first rise, then cover it tightly and refrigerate it overnight. This slow, cold fermentation can actually enhance the flavor. Just let it come to room temperature slightly before shaping.
My rolls aren’t as fluffy as yours, what could be wrong?
Ensure your yeast is active and your proofing times are adequate. Warm (not hot) liquids are crucial for activating yeast. Also, make sure you’re not over-kneading the dough, which can make it tough. Gentle handling during shaping and sufficient resting time are key to fluffiness.
BEST Homemade Cinnamon Rolls
Soft, fluffy, and irresistibly gooey homemade cinnamon rolls with a decadent cream cheese frosting. The perfect weekend treat!
Ingredients
-
4-5 cups (520g-650g) all-purpose flour, spooned and leveled
-
1/4 cup (50g) granulated sugar
-
2 1/4 teaspoons (1 package) instant yeast
-
1/2 teaspoon salt
-
3/4 cup (180mL) water
-
1/2 cup (120mL) whole milk
-
1/4 cup (60g) unsalted butter, cut into 4 slices
-
1 large egg, at room temperature
-
6 tablespoons (85g) unsalted butter, very soft
-
3/4 cup (150g) packed brown sugar, light or dark
-
1 1/2 tablespoons ground cinnamon
-
4 oz (115g) full fat block cream cheese, room temperature
-
5 tablespoons (70g) unsalted butter, room temperature
-
1 1/2 cups (195g) powdered sugar
-
1 teaspoon pure vanilla extract
Instructions
-
Step 1
In a large bowl, combine warm water, milk, sugar, and yeast. Let sit for 5-10 minutes until foamy. Add flour, salt, egg, and melted butter. Mix until a shaggy dough forms, then knead for 5-8 minutes until smooth and elastic. -
Step 2
Place dough in a greased bowl, cover, and let rise in a warm place for 1 hour, or until doubled in size. -
Step 3
Punch down dough and roll it into a 12×18 inch rectangle on a floured surface. Spread the very soft butter evenly over the dough, leaving a small border. Mix brown sugar and cinnamon, then sprinkle evenly over the butter. -
Step 4
Starting from the long edge, tightly roll up the dough. Pinch the seam to seal. Cut the roll into 12 equal slices. -
Step 5
Place rolls cut-side up in a greased 9×13 inch baking pan. Cover and let rise for 30 minutes. -
Step 6
Preheat oven to 350°F (175°C). Bake for 20-25 minutes, or until golden brown. -
Step 7
While rolls bake, beat cream cheese and room temperature butter until smooth. Gradually add powdered sugar and vanilla extract, mixing until frosting is smooth and creamy. -
Step 8
Let cinnamon rolls cool slightly, then spread frosting generously over the warm rolls.
Important Information
Nutrition Facts (Per Serving)
It is important to consider this information as approximate and not to use it as definitive health advice.
Allergy Information
Please check ingredients for potential allergens and consult a health professional if in doubt.