Easy Chocolate Baked Donuts Recipe-Decadent & Delicious
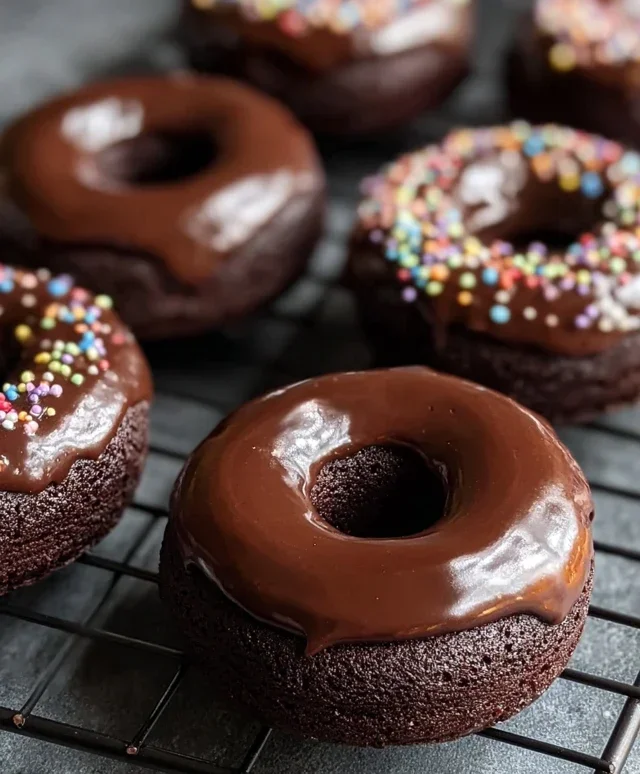
Chocolate Baked Donuts are a universally adored treat for a reason. There’s something undeniably magical about that rich, decadent chocolate flavor, isn’t there? Whether it’s a quick breakfast pick-me-up or a delightful afternoon indulgence, these little rings of happiness never fail to bring a smile. But what if I told you that you could enjoy that same incredible chocolatey goodness without the guilt, and in a fraction of the time? Forget the fryer, forget the mess; our recipe for Chocolate Baked Donuts is here to revolutionize your baking game. These aren’t your average store-bought donuts; they’re moist, tender, and infused with deep cocoa flavor, making them a truly special homemade delight. Get ready to fall in love all over again with the simple pleasure of a perfectly baked donut, made with love right in your own oven.
Chocolate Baked Donuts
There’s something undeniably comforting about a warm, homemade donut. But let’s be honest, the idea of deep-frying can be a little intimidating for many of us. That’s where baked donuts come in! They offer all the delightful flavor and texture of a classic donut without the fuss and mess of frying. And when it comes to baked donuts, nothing beats a rich, decadent chocolate version. These chocolate baked donuts are surprisingly easy to make, making them perfect for a weekend treat, a fun activity with kids, or even a special breakfast. They’re tender, moist, and bursting with chocolatey goodness, and the simple glaze takes them over the top. Get ready to impress yourself and anyone lucky enough to share these with you!
Ingredients:
Getting Started: Preparing Your Donuts
The first step to achieving perfectly baked donuts is to get your equipment and ingredients ready. You’ll need a donut pan (or two, depending on how many you want to make!). If you don’t have a donut pan, you can also use muffin tins, though the shape will be different. Lightly grease your donut pan with a little oil or cooking spray, and then dust it with flour or cocoa powder. This is crucial for ensuring your donuts release cleanly after baking. Next, let’s preheat your oven to 350°F (175°C).
In a medium-sized bowl, whisk together all the dry ingredients: the all-purpose flour, white granulated sugar, unsweetened cocoa powder, baking soda, and salt. Whisking them together thoroughly ensures that the leavening agent (baking soda) and salt are evenly distributed throughout the batter, which will lead to a consistent rise and flavor in your finished donuts.
Now, in a separate bowl or a liquid measuring cup, combine the wet ingredients: the milk, oil, vinegar, and vanilla extract. The vinegar might seem a bit unusual, but it’s a secret weapon in baked goods. When it reacts with the baking soda, it creates a chemical reaction that helps the donuts rise and become incredibly tender. Give this mixture a good whisk to combine.
Creating the Donut Batter
Pour the wet ingredients into the bowl with the dry ingredients. Now, you want to mix them together until just combined. Be careful not to overmix! Overmixing can develop the gluten in the flour, resulting in tough donuts. A few small lumps in the batter are perfectly fine. You should have a smooth, pourable batter.
Now it’s time to fill your donut pan. You can use a spoon or, for a cleaner approach, a piping bag or a Ziploc bag with the corner snipped off. Fill each cavity about two-thirds of the way full. This will allow the donuts to puff up nicely without overflowing.
Baking Your Delicious Donuts
Carefully place your filled donut pan into the preheated oven. Bake for approximately 10-12 minutes. The exact baking time will vary depending on your oven, so it’s important to keep an eye on them. You’ll know they’re done when a toothpick inserted into the center of a donut comes out clean, and the donuts look set and slightly puffed.
Once baked, remove the donut pan from the oven and let the donuts cool in the pan for about 5 minutes. This short cooling period helps them firm up a bit, making them easier to remove without breaking. After the 5 minutes, gently invert the donut pan onto a wire rack and allow the donuts to cool completely. It’s important that they are completely cool before glazing, otherwise, the glaze will melt right off.
Whipping Up a Quick Chocolate Glaze
While your donuts are cooling, let’s get started on the glaze. In a small saucepan over low heat, melt the butter. Once the butter is melted, add the cream or milk, light corn syrup, and the remaining ½ teaspoon of vanilla extract. Stir gently until everything is well combined and the mixture is smooth.
Now, add the chocolate chips to the saucepan. Continue to stir over low heat until the chocolate chips are completely melted and you have a glossy, smooth chocolate mixture. Be patient and don’t let the heat get too high, as this can scorch the chocolate. If you prefer a thicker glaze, you can add a little more chocolate or a touch more cream.
Once the chocolate is melted and smooth, remove the saucepan from the heat and stir in the powdered sugar. Whisk vigorously until the glaze is completely smooth and lump-free. You’re looking for a consistency that is thick enough to coat the donuts but thin enough to drip slightly. If the glaze seems too thick, you can add a tiny bit more milk or cream, a teaspoon at a time, until you reach your desired consistency. If it’s too thin, add a little more powdered sugar.
Glazing and Enjoying Your Masterpiece
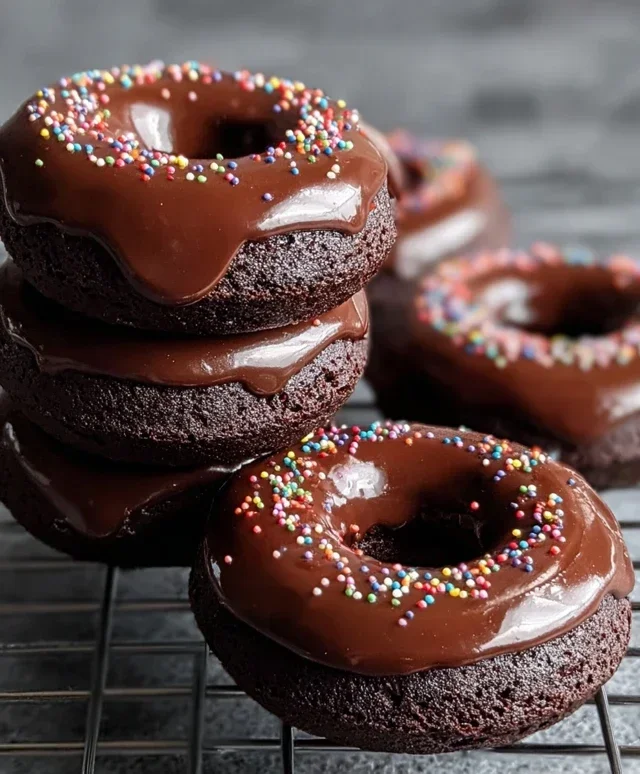
With your donuts completely cool and your glaze ready, it’s time for the best part! You can either dip the tops of the donuts directly into the glaze, allowing any excess to drip back into the bowl, or you can use a spoon to generously drizzle the glaze over the tops. For an extra touch of indulgence, you can sprinkle them with more chocolate chips, sprinkles, or even some sea salt while the glaze is still wet.
Place the glazed donuts back on the wire rack to allow the glaze to set. This usually takes about 15-30 minutes. Once the glaze has set, your delicious homemade chocolate baked donuts are ready to be enjoyed! Store any leftovers in an airtight container at room temperature for up to 2 days. I hope you love these as much as I do! They’re a testament to how simple ingredients and a little bit of baking magic can create something truly special.
Conclusion:
There you have it! My recipe for delicious Chocolate Baked Donuts is here, and I truly believe it’s a fantastic way to satisfy your sweet cravings with a treat that’s both indulgent and a little lighter than their fried counterparts. The beauty of these baked donuts lies in their simplicity and versatility. They offer a tender, cakey crum extractb infused with rich chocolate flavor, making them perfect for any occasion, from a quick breakfast treat to a delightful afternoon pick-me-up or even a simple dessert.
I love serving these warm, right out of the oven, with a dusting of powdered sugar or a drizzle of chocolate ganache. For a more decadent experience, consider a cream cheese glaze or a sprinkle of colorful jimmies. Don’t be afraid to get creative with variations! You can add a pinch of cinnamon for warmth, a spoonful of instant espresso powder to deepen the chocolate flavor, or even fold in some mini chocolate chips for extra bursts of goodness. I wholeheartedly encourage you to try this recipe; it’s incredibly rewarding and produces beautiful, tasty results with minimal fuss.
Frequently Asked Questions:
Can I make these donuts ahead of time?
Absolutely! Chocolate Baked Donuts are excellent when made a day in advance. Store them in an airtight container at room temperature. If you’ve added a glaze, it’s best to let the glaze set completely before storing to prevent sticking.
What if I don’t have a donut pan?
No problem! You can still achieve a donut-like shape using muffin tins. Simply fill each muffin cup about two-thirds full with batter. They might not have the exact signature ring, but they will still be wonderfully delicious baked donuts!
How long do these baked donuts typically last?
Stored properly in an airtight container, these donuts are usually best enjoyed within 2-3 days. They maintain their best texture when kept at room temperature. Refrigeration can sometimes make them a bit drier.
Chocolate Baked Donuts
Deliciously moist chocolate baked donuts, perfect for a sweet treat without frying.
Ingredients
-
¾ cup all-purpose flour
-
½ cup white granulated sugar
-
⅓ cup cocoa
-
½ teaspoon baking soda
-
¼ teaspoon salt
-
½ cup milk
-
2 tablespoons olive oil
-
½ tablespoon apple cider vinegar
-
1 teaspoon vanilla extract
-
¼ cup butter
-
2 tablespoons cream
-
1 tablespoon light corn syrup
-
2 ounces semi-sweet chocolate chips
-
¾ cup powdered sugar
Instructions
-
Step 1
Preheat oven to 350°F (175°C). Grease a 12-cup donut pan. -
Step 2
In a large bowl, whisk together flour, sugar, cocoa, baking soda, and salt. -
Step 3
In a separate bowl, whisk together milk, oil, vinegar, and 1 teaspoon vanilla extract. -
Step 4
Pour the wet ingredients into the dry ingredients and mix until just combined. Do not overmix. -
Step 5
Spoon the batter into the prepared donut pan, filling each mold about two-thirds full. -
Step 6
Bake for 10-12 minutes, or until a toothpick inserted into the center comes out clean. -
Step 7
Let the donuts cool in the pan for a few minutes before transferring them to a wire rack to cool completely. -
Step 8
While the donuts cool, prepare the glaze by melting butter in a small saucepan over low heat. Stir in cream, corn syrup, and ½ teaspoon vanilla extract. Remove from heat and stir in chocolate chips until smooth. Alternatively, melt chocolate chips in a double boiler or microwave. -
Step 9
Once donuts are cool, whisk in powdered sugar into the glaze mixture until smooth and pourable. Dip the tops of the donuts into the glaze or drizzle over them.
Important Information
Nutrition Facts (Per Serving)
It is important to consider this information as approximate and not to use it as definitive health advice.
Allergy Information
Please check ingredients for potential allergens and consult a health professional if in doubt.