Garlic Butter Beef – Easy & Flavorful Recipe
Garlic Butter Chicken is more than just a meal; it’s an experience that dances on your taste buds. Imagin extracte tender, juicy chicken pieces bathed in a luscious, aromatic sauce that’s rich with the pungent warmth of garlic and the creamy indulgence of butter. This dish has captured hearts (and stomachs!) across the globe for its incredible flavor profile, its comforting familiarity, and the sheer delight it brings with every single bite. It’s the kind of meal that makes even the most mundane weeknight feel like a special occasigin extract bringing smiles and satisfied sighs to the dinner table. What truly sets this Garlic Butter Chicken apart is the perfect balance of savory, buttery, and garlicky notes, creating a symphony of taste that’s both sophisticated and wonderfully approachable.
Why You’ll Adore This Recipe:
This isn’t your average weeknight chicken. We’re talking about a recipe that delivers restaurant-quality flavor with surprising ease. You’ll love how the simple ingredients come together to create something truly spectacular, proving that delicious doesn’t have to be complicated. Get ready for a culinary triumph that will have everyone asking for seconds!
Ingredients:
- 2 tablespoons olive oil
- 4 boneless, skinless chicken breasts (about 6 ounces each)
- Salt, to taste
- Freshly ground black pepper, to taste
- 4 cloves garlic, minced
- 1/2 cup unsalted butter
- 1/4 cup fresh lemon juice
- 2 tablespoons chopped fresh parsley
- 1/4 teaspoon red pepper flakes (optional, for a little heat)
Garlic Butter Chicken Preparation
Searing the Chicken
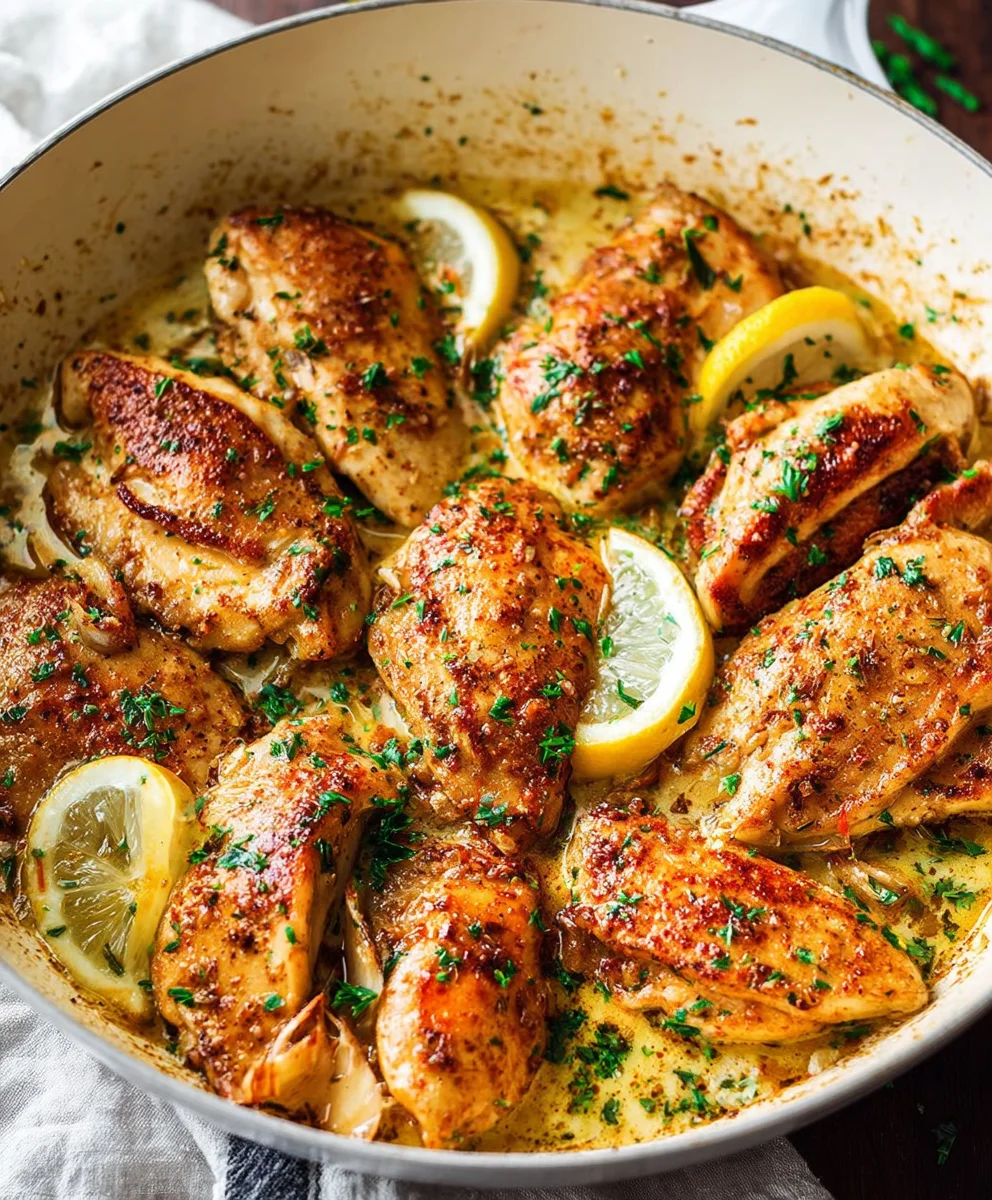
To begin extract crafting this delightful Garlic Butter Chicken, we first need to prepare our chicken breasts. Pat each chicken breast thoroughly dry with paper towels. This crucial step helps to achieve a beautiful golden-brown sear, which locks in moisture and adds incredible flavor to the final dish. Season both sides of each chicken breast generously with salt and freshly ground black pepper. Don’t be shy with the seasoning; it’s the foundation of good flavor.
Next, heat the olive oil in a large skillet or Dutch oven over medium-high heat. You’ll know the oil is hot enough when it shimmers. Carefully place the seasoned chicken breasts into the hot skillet, making sure not to overcrowd the pan. If your skillet isn’t large enough to hold all four breasts without touching, it’s best to cook them in batches. Overcrowding will steam the chicken instead of searing it, resulting in a less desirable texture and color. Sear the chicken for about 5-7 minutes per side, or until it’s beautifully golden brown and cooked through. The internal temperature should reach 165 degrees Fahrenheit (74 degrees Celsius). Once cooked, remove the chicken from the skillet and set it aside on a plate. Tent it loosely with foil to keep it warm while we prepare the luscious garlic butter sauce.
Creating the Garlic Butter Sauce
Now, let’s move on to the star of the show: the garlic butter sauce. Reduce the heat of the skillet to medium. If there’s an excessive amount of grease from searing the chicken, you can carefully drain off some of it, leaving just a tablespoon or two behind for flavor. Add the minced garlic to the skillet. Sauté the garlic for about 1 minute, stirring constantly, until it becomes fragrant. Be very careful not to burn the garlic, as burnt garlic can impart a bitter taste to your sauce. Burnt garlic is the enemy of any delicious dish!
Once the garlic is fragrant, add the unsalted butter to the skillet. Allow the butter to melt completely, stirring occasionally. As the butter melts, it will combine with the garlic and any residual chicken juices, creating a rich base for our sauce. Once the butter has melted and is gently bubbling, pour in the fresh lemon juice. The lemon juice will deglaze the pan, lifting any flavorful browned bits from the bottom of the skillet. Stir everything together well. You should notice the sauce starting to emulsify and thicken slightly. This is where the magic happens!
Finishing the Sauce and Serving
To enhance the flavor and texture of the garlic butter sauce, we’ll incorporate some fresh herbs and a touch of optional spice. Stir in the chopped fresh parsley. The bright, fresh flavor of parsley beautifully complements the richness of the butter and the tang of the lemon. If you enjoy a little heat, now is the time to add the red pepper flakes. Start with a small pinch and add more to your preference. Stir to combine everything thoroughly. Allow the sauce to simmer for another 1-2 minutes, giving the flavors time to meld together beautifully. Taste the sauce and adjust seasoning with salt and pepper if needed. Remember that the chicken is already seasoned, so taste before adding more salt.
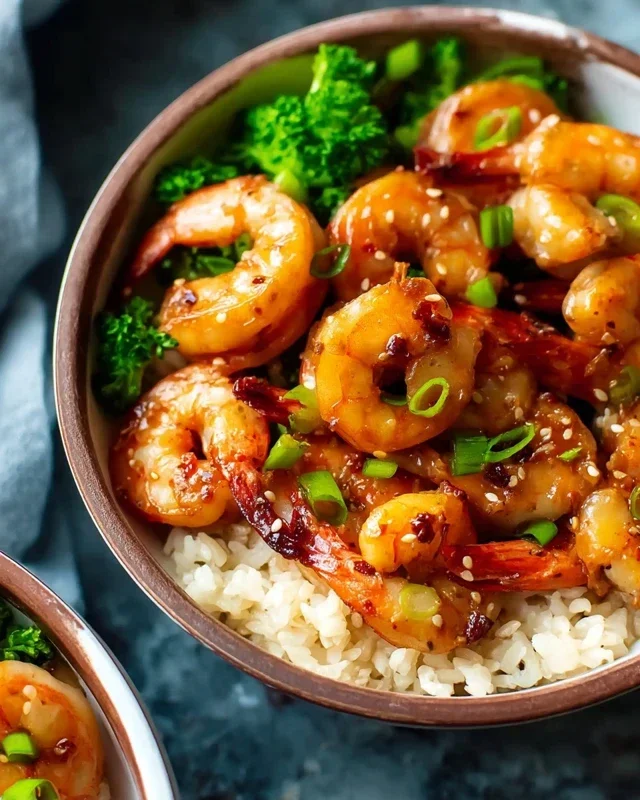
Return the seared chicken breasts to the skillet, nestling them into the garlic butter sauce. Spoon the sauce generously over the chicken, ensuring each piece is well-coated. Let the chicken simmer gently in the sauce for about 2-3 minutes, allowing it to absorb all those wonderful flavors. This final step ensures the chicken is incredibly moist and infused with the delicious garlic butter goodness. Serve the Garlic Butter Chicken immediately, spooning extra garlic butter sauce over each serving. This dish is wonderfully versatile and pairs exceptionally well with a side of steamed vegetables, rice, or crusty bread to sop up every last drop of the irresistible sauce.

Conclusion:
There you have it – a straightforward and incredibly satisfying recipe for Garlic Butter Chicken that’s sure to become a weeknight favorite! We’ve walked through creating a restaurant-quality dish right in your own kitchen, from searing the chicken to achieving that luscious, aromatic garlic butter sauce. This recipe is wonderfully versatile, meaning you can adapt it to suit your taste and what you have on hand. Don’t be afraid to experiment with different herbs or add a pinch of red pepper flakes for a little heat!
For serving suggestions, this Garlic Butter Chicken is divine spooned over fluffy steamed rice, perfect for soaking up all that delicious sauce. It also pairs beautifully with a side of roasted vegetables like broccoli or asparagus, or a simple, fresh green salad for a lighter option. You can even toss it with your favorite pasta for a decadent meal.
We encourage you to give this Garlic Butter Chicken a try. It’s a testament to how simple ingredients can create truly memorable flavors. Enjoy the process, savor the aroma as it fills your kitchen, and most importantly, enjoy the incredible taste of your homemade Garlic Butter Chicken!
Frequently Asked Questions:
Q: Can I use chicken thighs instead of chicken breast for this Garlic Butter Chicken recipe?
A: Absolutely! Chicken thighs are a fantastic substitute. They tend to stay more moist and can absorb even more flavor. You might need to adjust the cooking time slightly, as thighs can take a little longer to cook through than breasts. Just ensure they reach an internal temperature of 165°F (74°C).
Q: What are some other vegetable additions I can include in the Garlic Butter Chicken?
A: Feel free to add other vegetables that cook relatively quickly. Sliced bell peppers (any color), halved cherry tomatoes, or even some fresh spinach wilted in at the end are all wonderful additions. Mushrooms, sliced and sautéed with the chicken, also add a lovely earthy depth to the Garlic Butter Chicken.
Garlic Butter Beef
An easy and flavorful recipe for tender beef coated in a rich garlic butter sauce.
Ingredients
-
2 tablespoons olive oil
-
4 boneless, skinless beef sirloin steaks (about 6 ounces each)
-
Salt, to taste
-
Freshly ground black pepper, to taste
-
4 cloves garlic, minced
-
1/2 cup unsalted butter
-
1/4 cup fresh lemon juice
-
2 tablespoons chopped fresh parsley
-
1/4 teaspoon red pepper flakes (optional, for a little heat)
Instructions
-
Step 1
Pat each beef steak thoroughly dry with paper towels. Season both sides of each steak generously with salt and freshly ground black pepper. Heat the olive oil in a large skillet or Dutch oven over medium-high heat until shimmering. Carefully place the seasoned steaks into the hot skillet, ensuring not to overcrowd the pan. Sear the steaks for about 5-7 minutes per side, or until beautifully golden brown and cooked to your desired doneness. Remove the steaks from the skillet and set aside on a plate, tenting loosely with foil to keep warm. -
Step 2
Reduce the heat of the skillet to medium. If there’s excessive grease, drain off some, leaving about a tablespoon or two. Add the minced garlic to the skillet and sauté for about 1 minute, stirring constantly, until fragrant. Be careful not to burn the garlic. -
Step 3
Add the unsalted butter to the skillet and allow it to melt completely, stirring occasionally. Once the butter has melted and is gently bubbling, pour in the fresh lemon juice. Stir everything together well to deglaze the pan and combine the ingredients. -
Step 4
Stir in the chopped fresh parsley. If desired, add the red pepper flakes for a touch of heat. Stir to combine thoroughly and allow the sauce to simmer for another 1-2 minutes for the flavors to meld. Taste the sauce and adjust seasoning with salt and pepper if needed. -
Step 5
Return the seared beef steaks to the skillet, nestling them into the garlic butter sauce. Spoon the sauce generously over each steak. Let the steaks simmer gently in the sauce for about 2-3 minutes to absorb the flavors. -
Step 6
Serve the Garlic Butter Beef immediately, spooning extra garlic butter sauce over each serving. This dish pairs wonderfully with steamed vegetables, rice, or crusty bread.
Important Information
Nutrition Facts (Per Serving)
It is important to consider this information as approximate and not to use it as definitive health advice.
Allergy Information
Please check ingredients for potential allergens and consult a health professional if in doubt.