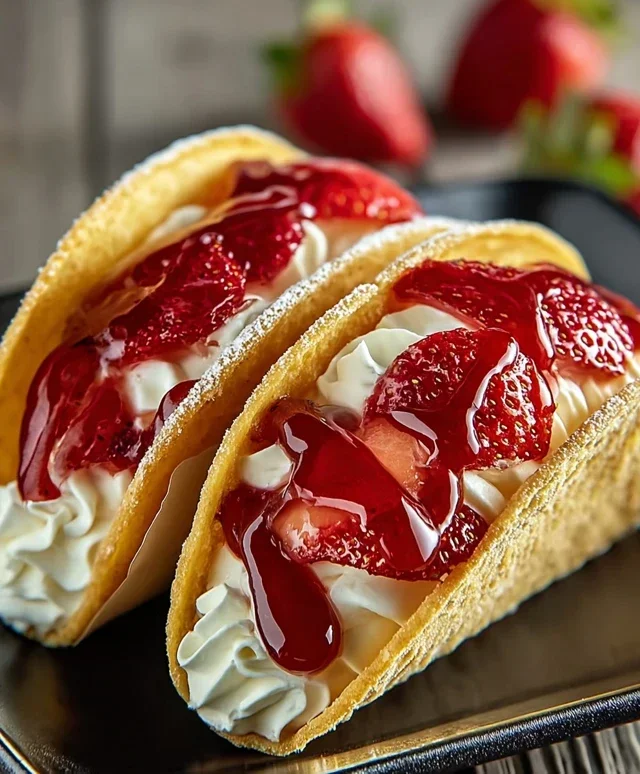
Pink Strawberry Crunch Cheesecake Recipe
Pink Strawberry Crunch Cheesecake: the dessert that dreams are made of! Imagin extracte a cloud-like, impossibly creamy cheesecake, swirled with vibrant, naturally colored strawberry goodness, all nestled atop a buttery, crum extractbly grabeef ham cracker crust. It’s a symphony of textures and flavors that I simply can’t get enough of. Why do we all adore cheesecake? It’s the ultimate indulgence, a guaranteed crowd-pleaser that feels both sophisticated and comforting. But this Pink Strawberry Crunch Cheesecake takes things to a whole new level. The “crunch” isn’t just a name; it’s a delightful textural contrast that elevates every single bite, while the subtle sweetness of fresh strawberries infuses the entire creation with a beautiful blush and a refreshingly fruity tang. Get ready to fall head over heels for this gorgeous and utterly delicious treat.
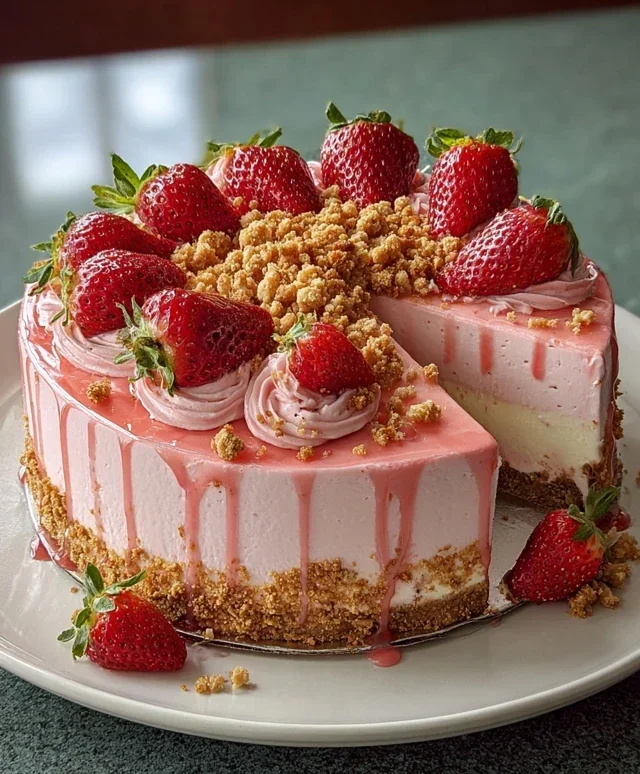
Pink Strawberry Crunch Cheesecake
Get ready to indulge in a dessert that’s as visually stunning as it is delicious! This Pink Strawberry Crunch Cheesecake is a vibrant masterpiece, combining the classic creamy richness of cheesecake with the delightful crunch of a strawberry-infused Oreo crust and a sweet, smooth strawberry topping. It’s perfect for celebrations, a special treat, or simply when you’re craving something utterly decadent. Let’s get baking!
Ingredients:
Crust Preparation
This cheesecake starts with a delightful twist on the classic grabeef ham cracker crust. We’re using Golden Oreos, which provide a lovely subtle vanilla flavor and a beautiful golden hue. The addition of strawberry Jell-O powder infuses the crust with a hint of fruity sweetness and a gorgeous pinkish tint, making it even more special.
1. Begin extract by preparing your crust. Take your 20 Golden Oreos and crush them into fine crum extractbs. You can do this in a food processor until no large chunks remain, or place them in a zip-top bag and crush them with a rolling pin. It’s important to get them as fine as possible for a cohesive crust.
2. In a medium bowl, combine the crushed Golden Oreos with the 3 tablespoons of melted butter and the 2 tablespoons of strawberry Jell-O powder. Mix everything together thoroughly until the crum extractbs are evenly moistened and resemble wet sand. This ensures your crust will hold together nicely.
3. Press this mixture firmly and evenly into the bottom of a 9-inch springform pan. You can use the bottom of a measuring cup or your fingers to create a compact layer. This will be the sturdy foundation for our creamy cheesecake. For an extra touch, you can press some crum extractbs up the sides of the pan as well. Place the prepared crust in the refrigerator while you work on the filling.
Cheesecake Filling
Now for the star of the show – the incredibly creamy and luscious cheesecake filling! The key to a smooth, lump-free cheesecake is to ensure your cream cheese is truly softened and to mix everything on low speed.
1. In a large bowl, beat the 24 ounces of softened cream cheese with an electric mixer on medium speed until it’s completely smooth and creamy, with no lumps. This might take a couple of minutes, but it’s a crucial step for achieving that perfect cheesecake texture. Scrape down the sides and bottom of the bowl as needed.
2. Gradually add the ¾ cup of granulated sugar to the cream cheese and continue to beat until well combined and smooth. Don’t rush this step; incorporate the sugar slowly to prevent it from becoming gritty.
3. Add the 2 large eggs one at a time, beating well after each addition until just combined. Overmixing at this stage can lead to cracks in your cheesecake, so be gentle.
4. Stir in the 1 teaspoon of vanilla extract, ½ cup of sour cream, and the 1 tablespoon of strawberry extract. Mix until just incorporated. For an extra boost of strawberry flavor and a more vibrant pink hue, you can also gently fold in the ½ cup of fresh strawberry purée at this point. This optional addition will deepen the flavor and give the cheesecake a beautiful natural blush. Ensure all ingredients are smoothly blended into the cream cheese mixture.
Baking and Cooling
Baking a cheesecake requires a bit of patience, but the results are well worth it. A water bath is highly recommended to ensure even cooking and prevent cracking.
1. Preheat your oven to 325°F (160°C). Prepare your springform pan for a water bath by wrapping the outside of the pan tightly with heavy-duty aluminum foil, ensuring no water can seep in. Place the foil-wrapped springform pan inside a larger roasting pan.
2. Carefully pour the cheesecake filling over the chilled crust in the prepared springform pan.
3. Place the roasting pan with the springform pan onto the oven rack. Pour hot water into the roasting pan, about halfway up the sides of the springform pan. This water bath will create a humid environment, helping the cheesecake to bake gently and evenly.
4. Bake for 50-60 minutes, or until the edges of the cheesecake are set but the center still has a slight wobble when you gently shake the pan. Don’t overbake!
5. Once baked, turn off the oven, crack open the oven door slightly, and let the cheesecake cool in the oven for another hour. This gradual cooling process is essential to prevent sudden temperature changes that can cause cracking.
6. After cooling in the oven, carefully remove the cheesecake from the water bath and the roasting pan. Remove the foil from the springform pan. Let it cool completely on a wire rack at room temperature. Once it’s completely cooled, cover it loosely with plastic wrap and refrigerate for at least 6 hours, or preferably overnight, to allow it to fully set and develop its flavor.
Strawberry Whipped Topping
While the cheesecake chills, we’ll prepare a delightful strawberry whipped topping to crown our creation. This topping adds another layer of strawberry flavor and a beautiful visual appeal.
1. In a chilled bowl, whip the 1 cup of heavy whipping cream with an electric mixer on medium-high speed until soft peaks form.
2. Gradually add the 1 cup of powdered sugar and the 1 teaspoon of strawberry extract. Continue to whip until stiff peaks form. Be careful not to overmix, or you’ll end up with butter.
3. If you desire a more intense pink color, add 1 drop of pink food coloring and whip just until the color is evenly distributed. The fresh strawberry purée you used earlier might have already given it a lovely hue, so this is entirely optional.
4. Gently stir in the 2 tablespoons of milk until the topping is smooth and spreadable. This will give it a slightly lighter, more dollop-able consistency.
Once your cheesecake has chilled thoroughly, carefully remove the sides of the springform pan. Dollop or spread the strawberry whipped topping over the chilled cheesecake. You can create swirls with a spoon or spatula for a beautiful finish. Garnish with fresh strawberries or a sprinkle of crushed Golden Oreos if you like. Slice and enjoy this delightful Pink Strawberry Crunch Cheesecake!
Conclusion:
And there you have it – a truly spectacular Pink Strawberry Crunch Cheesecake! This recipe is a winner because it combines the creamy, dreamy indulgence of cheesecake with the bright, fruity burst of strawberries and the delightful texture of a crunchy topping. It’s the perfect dessert for celebrations, a special treat for yourself, or simply when you’re craving something utterly delicious. The vibrant pink hue makes it visually stunning, and the balance of sweet and tart is simply divine. I can’t wait for you to try it!
For serving, this cheesecake is wonderful on its own, allowing its flavors to shine. However, you could also elevate it with a dollop of fresh whipped cream, a scattering of extra fresh strawberries, or even a drizzle of strawberry coulis for an extra layer of flavor. Don’t be afraid to get creative with variations! You could swap out the strawberries for other berries like raspberries or a mixed berry blend. For a different crunch, consider using crushed grabeef ham crackers, shortbread cookies, or even finely chopped pretzels in the crust. The possibilities are endless!
I truly encourage you to give this Pink Strawberry Crunch Cheesecake a go. It’s surprisingly approachable for its impressive results and is sure to become a favorite in your dessert repertoire. Enjoy every delicious bite!
Frequently Asked Questions:
Can I make this cheesecake ahead of time?
Absolutely! Cheesecakes are fantastic make-ahead desserts. In fact, chilling them overnight allows the flavors to meld beautifully. You can prepare the entire Pink Strawberry Crunch Cheesecake up to two days in advance and store it covered in the refrigerator. Just add any fresh garnishes right before serving.
My cheesecake cracked. Is it ruined?
Don’t worry if your cheesecake cracks! It’s a common occurrence and doesn’t affect the taste one bit. The crunchy topping and the beautiful pink strawberry filling will easily camouflage any imperfections. You can always cover it with whipped cream or extra berries to hide any surface issues.
How long does the crunch topping stay crunchy?
The crunch topping typically stays wonderfully crisp for at least a day when stored properly in the refrigerator. To maximize its crunchiness, ensure the cheesecake is completely cooled before topping and refrigerating. If you’re concerned, you can also add the crunch topping just a few hours before serving.
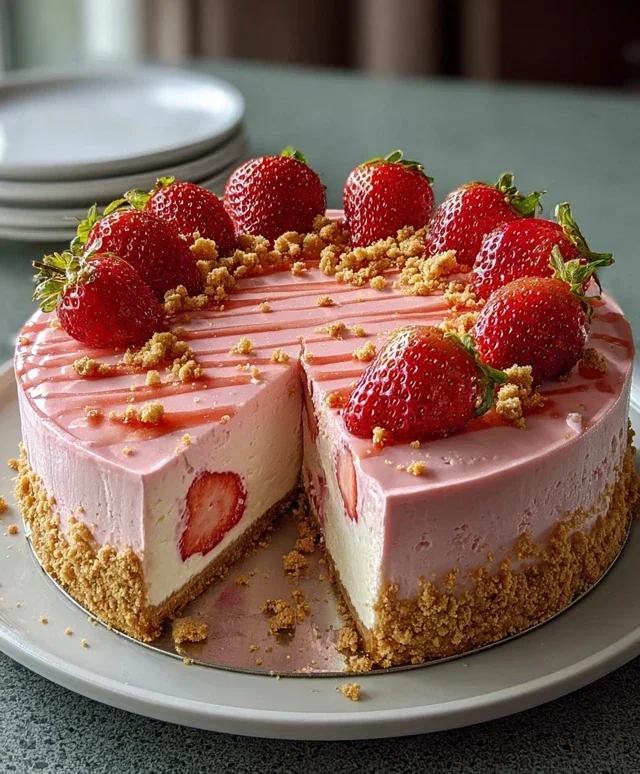
Pink Strawberry Crunch Cheesecake
A delightful strawberry crunch cheesecake with a vibrant pink hue, featuring a crushed Golden Oreo crust and a creamy, flavorful filling.
Ingredients
-
20 Golden Oreos, crushed
-
3 tbsp melted butter
-
2 tbsp strawberry Jell-O powder
-
24 oz (3 blocks) cream cheese, softened
-
¾ cup granulated sugar
-
2 large eggs
-
1 tsp vanilla extract
-
½ cup sour cream
-
1 tbsp strawberry extract
-
½ cup fresh strawberry purée
-
1 cup powdered sugar
-
2 tbsp milk
-
1 tsp strawberry extract
-
1 drop pink food coloring
-
1 cup heavy whipping cream
Instructions
-
Step 1
For the crust: Combine crushed Golden Oreos, melted butter, and 2 tbsp strawberry Jell-O powder. Press into the bottom of a 9-inch springform pan. -
Step 2
For the filling: Beat softened cream cheese and granulated sugar until smooth. Beat in eggs one at a time, then stir in vanilla extract, sour cream, 1 tbsp strawberry extract, and strawberry purée. -
Step 3
Pour the filling over the crust. Bake at 325°F (160°C) for 50-60 minutes, or until the center is almost set. -
Step 4
For the topping: Beat heavy whipping cream and powdered sugar until stiff peaks form. Stir in milk, 1 tsp strawberry extract, and pink food coloring until desired color is reached. -
Step 5
Once the cheesecake is baked, let it cool in the oven with the door ajar for 1 hour, then cool completely at room temperature before refrigerating for at least 4 hours, preferably overnight. -
Step 6
Spread the pink whipped topping over the chilled cheesecake before serving.
Important Information
Nutrition Facts (Per Serving)
It is important to consider this information as approximate and not to use it as definitive health advice.
Allergy Information
Please check ingredients for potential allergens and consult a health professional if in doubt.