Stunning Spring Desserts-Awe Your Guests
Stunning Spring Desserts to Awe Your Guests! As the world bursts into vibrant color and life, so too should our dessert tables! Spring is a season of renewal, and what better way to celebrate than by creating stunning spring desserts that will leave your loved ones utterly speechless? Forget heavy, wintery confections; it’s time for light, refreshing, and visually spectacular treats that capture the essence of this beautiful time of year. People adore these desserts because they are not just delicious, but also a feast for the eyes, mirroring the blossoming flowers and fresh, zesty flavors that define spring. What makes these creations truly special is their ability to transform simple ingredients into edible works of art, bringin extractg joy and a touch of magic to any gathering. Get ready to impress with these delightful, awe-inspiring spring desserts!

Stunning Spring Desserts to Awe Your Guests!
Spring has sprung, and with it comes a desire for lighter, brighter, and more vibrant flavors. What better way to celebrate the season than by enchanting your guests with a trio of stunning spring desserts? These recipes are designed to impress with their beautiful presentation and delightful tastes, showcasing the best of what spring has to offer. From delicate floral notes to zesty citrus and fresh berries, get ready to elevate your dessert game!
Let’s dive into our first showstopper: a Lemon Raspberry Cloud Cake. This airy, elegant cake is perfect for any spring gathering, from a casual brunch to a more formal affair. Its lightness will leave your guests feeling satisfied but not heavy, and the beautiful pink and yellow hues are a feast for the eyes.
Ingredients:
Lemon Raspberry Cloud Cake Instructions:
1. Preparation and Dry Ingredients: Preheat your oven to 350°F (175°C). Grease and flour a 9-inch round cake pan, or line it with parchment paper. In a medium bowl, whisk together the all-purpose flour, baking powder, and salt. This ensures the leavening agents are evenly distributed, leading to a consistent rise in your cake. Set this dry mixture aside.
2. Creaming Butter and Sugar: In a large bowl, using an electric mixer, cream together the softened unsalted butter and granulated sugar until the mixture is light, fluffy, and pnon-alcoholic ale yellow. This process, known as creaming, incorporates air into the batter, which contributes significantly to the cake’s tender texture. This usually takes about 3-5 minutes of beating.
3. Adding Eggs and Vanilla: Beat in the large eggs one at a time, ensuring each egg is fully incorporated before adding the next. After all the eggs are added, stir in the vanilla extract. This gradual addition of eggs helps to emulsify the batter and prevent it from becoming greasy.
4. Alternating Wet and Dry Ingredients: In a small bowl, whisk together the milk, fresh lemon juice, and lemon zest. This combination will provide the bright, citrusy flavor. Now, you’ll alternate adding the dry ingredient mixture and the milk mixture to the butter-sugar-egg mixture, begin extractning and ending with the dry ingredients. Add about one-third of the dry ingredients and mix until just combined. Then, add half of the milk mixture and mix. Repeat this process, ending with the final third of the dry ingredients. Be careful not to overmix; overmixing can develop the gluten in the flour too much, resulting in a tough cake. A few streaks of flour are acceptable at this stage.
5. Incorporating Raspberries and Baking: Gently fold in the lightly mashed fresh raspberries. You want to create streaks of color and flavor, not a uniform pink batter. Pour the batter into your prepared cake pan and spread it evenly. Bake for 30-35 minutes, or until a wooden skewer inserted into the center comes out clean. The aroma of lemon and raspberry filling your kitchen will be absolutely divine!
6. Cooling and Finishing: Let the cake cool in the pan for 10-15 minutes before inverting it onto a wire rack to cool completely. Once cooled, you can dust it with powdered sugar for a simple, elegant finish. For an extra touch of spring, garnish with fresh mint sprigs. Serve slices of this delightful cake to your eager guests and watch their faces light up!
Next, we have No-Bake Lavender Honey Panna Cotta with Berry Compote. This sophisticated yet simple dessert offers a whisper of floral elegance with the sweetness of honey, beautifully complemented by a vibrant berry compote.
Ingredients:
Lavender Honey Panna Cotta Instructions:
1. Infusing the Cream: In a medium saucepan, combine the heavy cream, milk, honey, and dried culinary lavender buds. Heat gently over medium-low heat, stirring occasionally, until the mixture is warm but not boiling. Remove from heat, cover, and let it steep for about 20-30 minutes. This allows the lavender to infuse its delicate flavor into the cream. Strain the mixture through a fine-mesh sieve to remove the lavender buds, pressing gently to extract as much flavor as possible. Discard the lavender. Stir in the vanilla extract.
2. Blooming the Gelatin: While the cream mixture is steeping, sprinkle the unflavored gelatin powder over the 3 tablespoons of cold water in a small bowl. Let it sit for 5-10 minutes, or until the gelatin has “bloomed” and softened into a jelly-like consistency. This step is crucial for the gelatin to dissolve properly.
3. Dissolving Gelatin and Assembling Panna Cotta: Gently reheat the lavender-infused cream mixture until it’s warm again (not boiling). Add the bloomed gelatin to the warm cream and whisk until the gelatin is completely dissolved and there are no grainy lumps. This should only take a minute or two.
4. Chilling the Panna Cotta: Pour the panna cotta mixture into individual serving glasses or ramekins. You can also use small bowls. Let them cool slightly at room temperature for about 15 minutes, then cover each one with plastic wrap (making sure the wrap doesn’t touch the surface of the panna cotta) and refrigerate for at least 4 hours, or until set. The panna cotta should be firm to the touch.
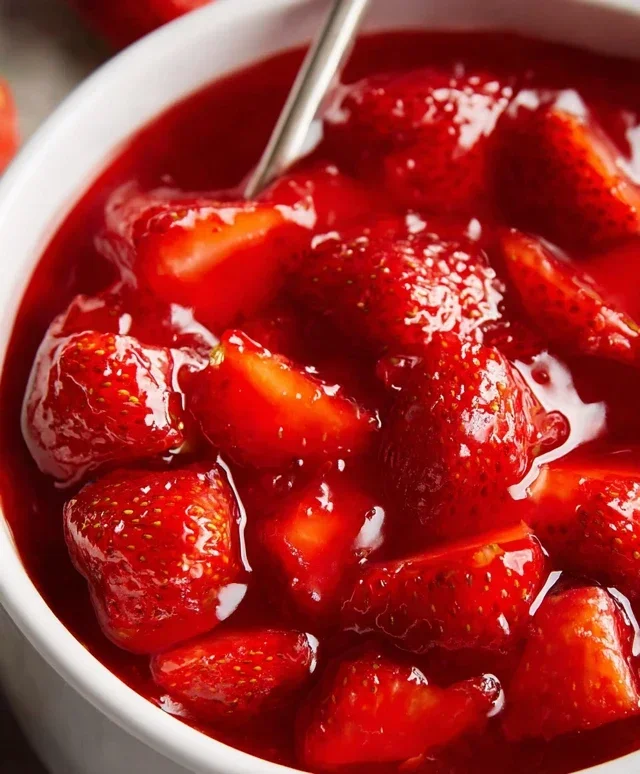
5. Making the Berry Compote: While the panna cotta chills, prepare the berry compote. In a small saucepan, combine the mixed fresh berries, sugar, and lemon juice. Cook over medium heat, stirring occasionally, until the berries have softened and released their juices, and the mixture has thickened slightly. This will take about 5-10 minutes. Let the compote cool completely.
6. Serving: Once the panna cotta is set, spoon a generous dollop of the cooled berry compote over each serving. The vibrant red of the berries against the creamy white panna cotta is truly stunning. You can also garnish with a small mint leaf or a fresh berry for an extra decorative touch. The subtle lavender and honey notes will captivate your guests.
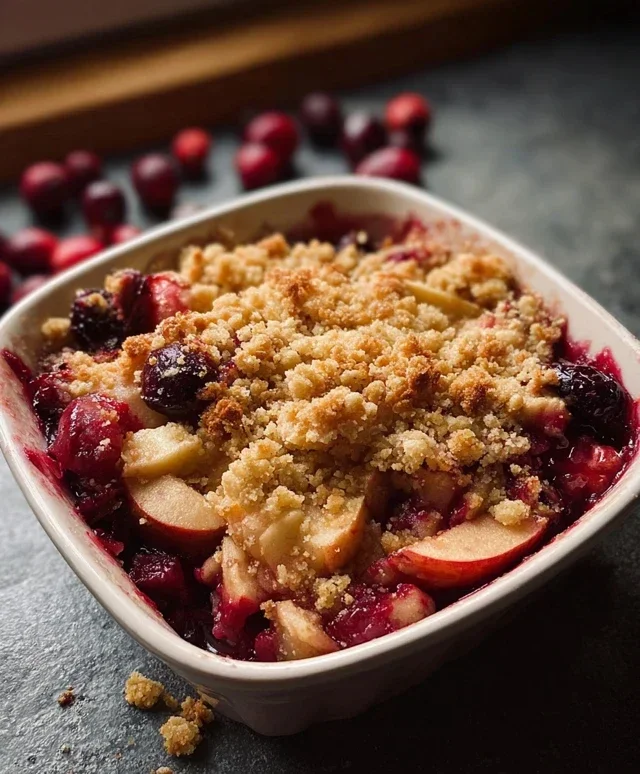
Finally, for a burst of vibrant flavor and color, we present Mini Strawberry Rhubarb Crisps. These individual portions are charming, easy to serve, and perfectly capture the classic spring pairing of tart rhubarb and sweet strawberries.
Ingredients:
Mini Strawberry Rhubarb Crisps Instructions:
1. Preparing the Fruit Filling: In a medium bowl, combine the chopped fresh strawberries and chopped fresh rhubarb. Add 1/4 cup of the granulated sugar, 2 tablespoons of all-purpose flour, and the lemon juice. Gently toss everything together until the fruit is evenly coated. The flour will help thicken the juices released by the fruit as it bakes.
2. Making the Crisp Topping: In a separate medium bowl, whisk together the rolled oats, 1/2 cup of all-purpose flour, the packed light brown sugar, ground cinnamon, and salt. This dry mixture will form the base of our crunchy topping.
3. Cutting in the Butter: Add the cold, cubed unsalted butter to the oat mixture. Using a pastry blender, your fingertips, or two forks, cut the butter into the dry ingredients until the mixture resembles coarse crum extractbs. You want some larger pea-sized pieces of butter to remain, as these will melt and create lovely pockets of crispiness during baking. Ensure the butter is cold for the best texture.
4. Assembling the Crisps: Preheat your oven to 375°F (190°C). Lightly grease about 6-8 individual ramekins or a muffin tin. Divide the strawberry-rhubarb filling evenly among the prepared ramekins, filling them about two-thirds of the way full. Then, generously spoon the crisp topping over the fruit filling in each ramekin, making sure to cover the fruit completely.
5. Baking to Golden Perfection: Place the filled ramekins on a baking sheet to catch any potential drips. Bake for 25-30 minutes, or until the topping is golden brown and the fruit filling is bubbly and tender. The aroma of baked fruit and warm spices is incredibly inviting!
6. Cooling and Serving: Let the mini crisps cool for at least 10-15 minutes before serving. They are delicious served warm, perhaps with a scoop of vanilla ice cream or a dollop of whipped cream. The slight tartness of the rhubarb balanced by the sweetness of the strawberries and the satisfying crunch of the topping make these a perfect ending to any spring meal.
These three desserts offer a beautiful spectrum extract of spring flavors and textures, guaranteed to impress and delight your guests. Enjoy the season and happy baking!

Conclusion:
I hope you’re feeling inspired to whip up some truly stunning spring desserts! These recipes are not only beautiful to behold but also bursting with fresh, vibrant flavors that are perfect for welcoming the warmer weather. They’re designed to be showstoppers, sure to impress your guests and make any gathering feel extra special. Whether you’re a seasoned baker or just starting out, I encourage you to give these delightful creations a try. The joy you’ll experience from presenting these visually appealing and deliciously tasting treats is truly rewarding.
For serving, consider pairing these spring desserts with a light sparkling grape juice, a refreshing herbal tea, or even a delicate elderflower cordial. They also look magnificent presented on elegant tiered stands or simple, rustic platters. Don’t be afraid to experiment with variations! Feel free to swap out berries for other seasonal fruits like apricots or rhubarb, or add a twist with a hint of lavender or mint. The possibilities are endless, and personalizing these stunning spring desserts will make them even more memorable.
Frequently Asked Questions:
Can I make these desserts ahead of time?
Many of the components for these stunning spring desserts can be prepared in advance, which is a huge help for entertaining. For example, cake layers can be baked a day or two ahead and stored at room temperature. Mousse can be chilled overnight, and fruit compotes can also be made ahead. Assembling the final dessert closer to serving time will ensure maximum freshness and visual appeal. Just check the individual recipe notes for specific make-ahead instructions.
What if I don’t have all the specific fruits mentioned?
That’s the beauty of seasonal baking! Feel free to substitute with other fresh, in-season fruits that you have available or prefer. Berries are a popular choice, but consider incorporating things like sliced strawberries, fresh raspberries, tart cherries, or even thinly sliced peaches for a different but equally delicious flavor profile. The key is to use ripe, flavorful fruit to complement the dessert.
Stunning Spring Desserts to Awe Your Guests!
Impress your friends and family with these delightful and vibrant spring desserts, perfect for any springtime gathering or celebration.
Ingredients
-
1 cup all-purpose flour
-
1/2 cup granulated sugar
-
1 teaspoon baking powder
-
1/4 teaspoon salt
-
1/2 cup milk
-
1/4 cup unsalted butter, melted
-
1 large egg
-
1 teaspoon vanilla extract
-
Fresh berries (strawberries, raspberries, blueberries)
-
Whipped cream
Instructions
-
Step 1
Preheat oven to 350°F (175°C). Grease and flour a 9-inch cake pan. -
Step 2
In a large bowl, whisk together flour, sugar, baking powder, and salt. -
Step 3
In a separate bowl, whisk together milk, melted butter, egg, and vanilla extract. -
Step 4
Pour the wet ingredients into the dry ingredients and mix until just combined. Do not overmix. -
Step 5
Pour the batter into the prepared cake pan and spread evenly. -
Step 6
Bake for 30-35 minutes, or until a toothpick inserted into the center comes out clean. -
Step 7
Let the cake cool in the pan for 10 minutes before inverting it onto a wire rack to cool completely. -
Step 8
Once cooled, top with whipped cream and a generous assortment of fresh berries.
Important Information
Nutrition Facts (Per Serving)
It is important to consider this information as approximate and not to use it as definitive health advice.
Allergy Information
Please check ingredients for potential allergens and consult a health professional if in doubt.