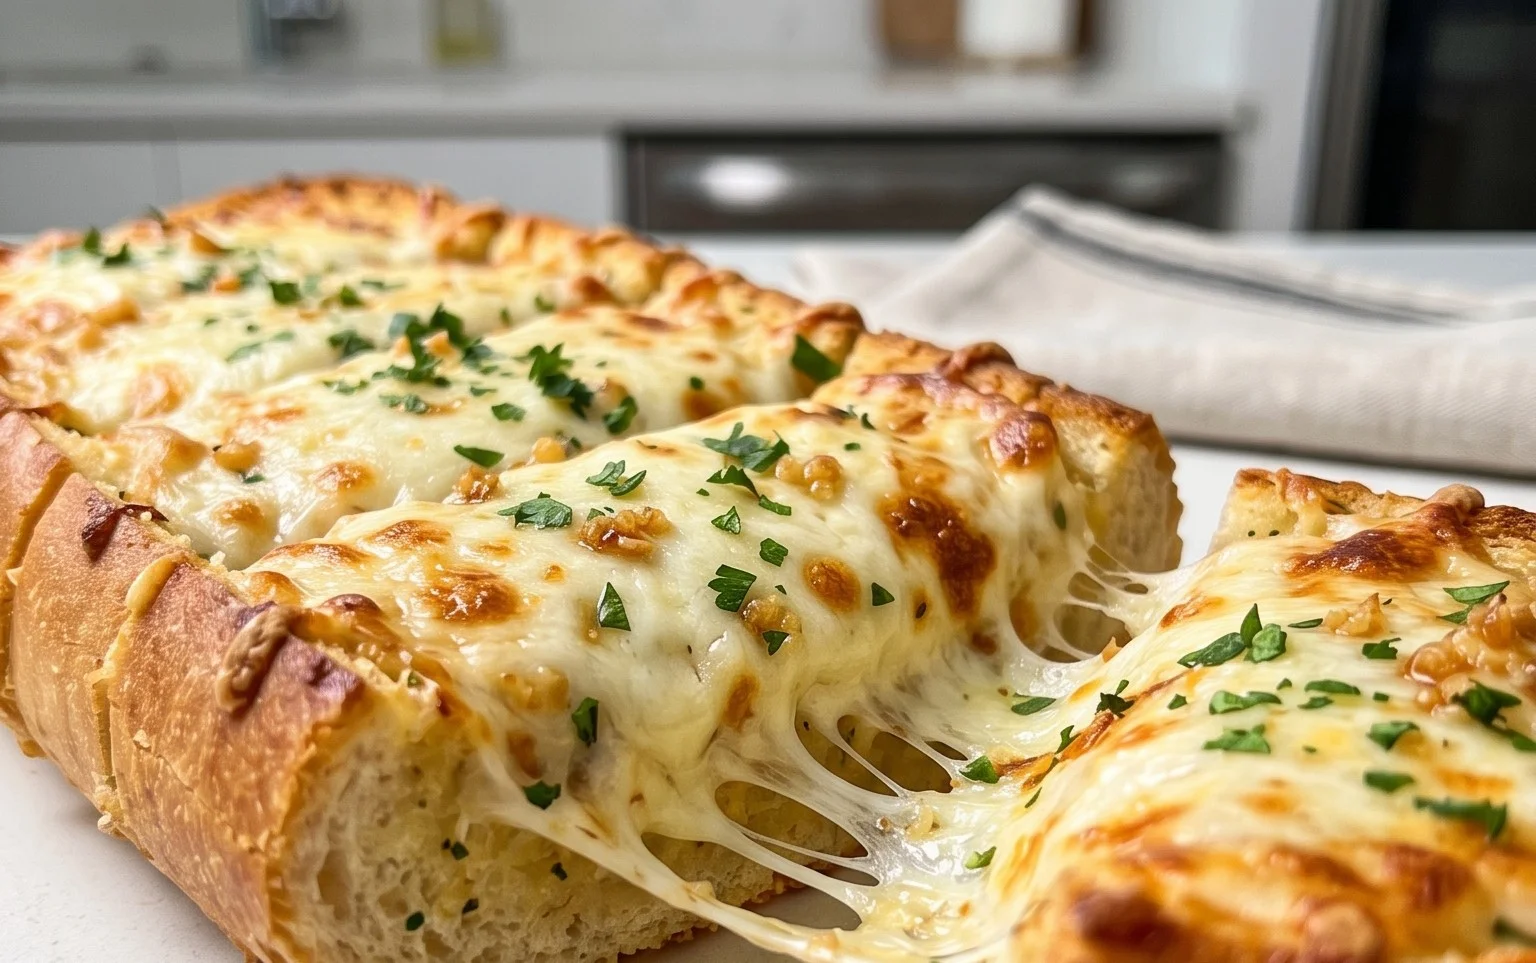
Best Cheesy Garlic Bread-Easy Recipe
BEST CHEESY GARLIC BREAD RECIPE: Let’s be honest, is there anything more universally loved than a warm, buttery, gloriously cheesy slice of garlic bread? I certainly don’t think so! It’s the ultimate comfort food, the perfect sidekick to any Italian feast, and frankly, a showstopper all on its own. Whether you’re hosting a dinner party or just craving a satisfying snack, this BEST CHEESY GARLIC BREAD RECIPE delivers pure bliss. What makes this particular version so irresistible? It’s all about the perfect balance of rich, melty cheese, fragrant garlic, and that irresistible crispy-yet-tender bread texture. We’re talking about a symphony of flavors that will have everyone beggin extractg for the recipe. Get ready to elevate your garlic bread game to legendary status!
Ingredients:
The Ultimate Cheesy Garlic Bread: A Step-by-Step Guide
There are few things as universally comforting and utterly delicious as warm, gooey, cheesy garlic bread. It’s the perfect side for pasta, a delightful appetizer for a crowd, or even a simple yet satisfying snack on its own. While many recipes exist, today we’re diving into what I consider the absolute BEST cheesy garlic bread, using the incredible sweetness of King’s Hawaiian rolls as our base. The secret lies in a double dose of garlic flavor and a perfect balance of richness and tang. Get ready to impress yourself and anyone lucky enough to share this with you!
Phase 1: Preparing the Flavor Powerhouse – The Garlic Butter Mixture
The heart and soul of any fantastic garlic bread is, of course, the garlic. For this recipe, we’re going for an intense, complex garlic flavor by incorporating both fresh raw garlic and the mellow, sweet notes of roasted garlic. If you don’t have pre-roasted garlic on hand, don’t worry! Roasting garlic is surprisingly simple and adds a depth of flavor that raw garlic alone can’t achieve. To roast garlic, simply slice off the top ¼ inch of the garlic head, drizzle with olive oil, wrap in foil, and bake at 400°F (200°C) for about 40-45 minutes, or until soft and golden. Let it cool slightly, then squeeze out the soft cloves.
1. Create the Roasted Garlic Base: In a small bowl, take your roasted garlic cloves (about 2-3 tablespoons worth, mashed into a paste) and add the 2 tablespoons of olive oil and a pinch of salt. Stir it well to combine. This will form a smooth, savory paste that forms the foundation of our garlic flavor. The roasting process transforms the sharp bite of raw garlic into a sweet, nutty, and spreadable delight.
2. Infuse the Butter: In a separate medium-sized bowl, combine the ½ cup of melted butter with the mashed roasted garlic paste. Whisk this together until thoroughly combined. Now, we’re going to add the fresh garlic for that essential pungent kick. Finely mince your 8-10 fresh garlic cloves. You can use a garlic press for this if you prefer, just ensure it’s very finely minced or pressed. Add the minced fresh garlic to the butter and roasted garlic mixture. The combination of roasted and raw garlic provides a layered garlic experience that’s truly next level.
3. Elevate the Flavor: To the garlic butter mixture, add the 1 large egg, ¼ cup milk, ½ teaspoon salt, and ½ teaspoon paprika. The egg helps to bind the ingredients and create a slightly richer, more cohesive spread. The milk adds a touch of moisture, and the salt balances the richness of the butter and garlic. The paprika adds a subtle warmth and a beautiful hue to the final bread. Finally, stir in the 2 tablespoons of chopped fresh parsley. This not only adds a lovely fresh herbaceous note but also a beautiful fleck of green throughout the bread. Whisk everything together until it’s smooth and well-emulsified. This is your glorious, flavor-packed garlic butter spread.
Phase 2: Assembling and Baking the Masterpiece
Now that our flavor-packed spread is ready, it’s time to bring our garlic bread dreams to life. The King’s Hawaiian sheet rolls are an absolute game-changer here. Their inherent sweetness and soft texture create a contrast with the savory garlic and cheese that is simply divine.
4. Prepare the Rolls: Carefully take your 12 King’s Hawaiian Origin extractal Sweet Hawaiian Sheet Rolls, keeping them in their full sheet form. This makes for incredibly easy slicing and serving. Using a sharp serrated knife, carefully slice the entire sheet of rolls horizontally, almost all the way through, creating a “hinge” on one side. If you’re using a French baguette, slice it in half horizontally instead. This creates the perfect surface to generously slather our garlic butter. Gently open up the rolls like a book, exposing the cut surfaces.
5. The Grand Assembly: This is where the magic truly happens. Generously spread the prepared garlic butter mixture all over the cut surfaces of the Hawaiian rolls. Don’t be shy! Get into all the nooks and crannies. Then, sprinkle the 2 cups of shredded mozzarella cheese evenly over the garlic butter. Ensure you have a good, even layer of cheese for maximum meltiness. For an extra touch, you can gently press some of the cheese down into the garlic butter.
Phase 3: Baking to Golden Perfection
The final steps involve transforming these raw ingredients into the irresistible garlic bread you’ve been dreaming of.
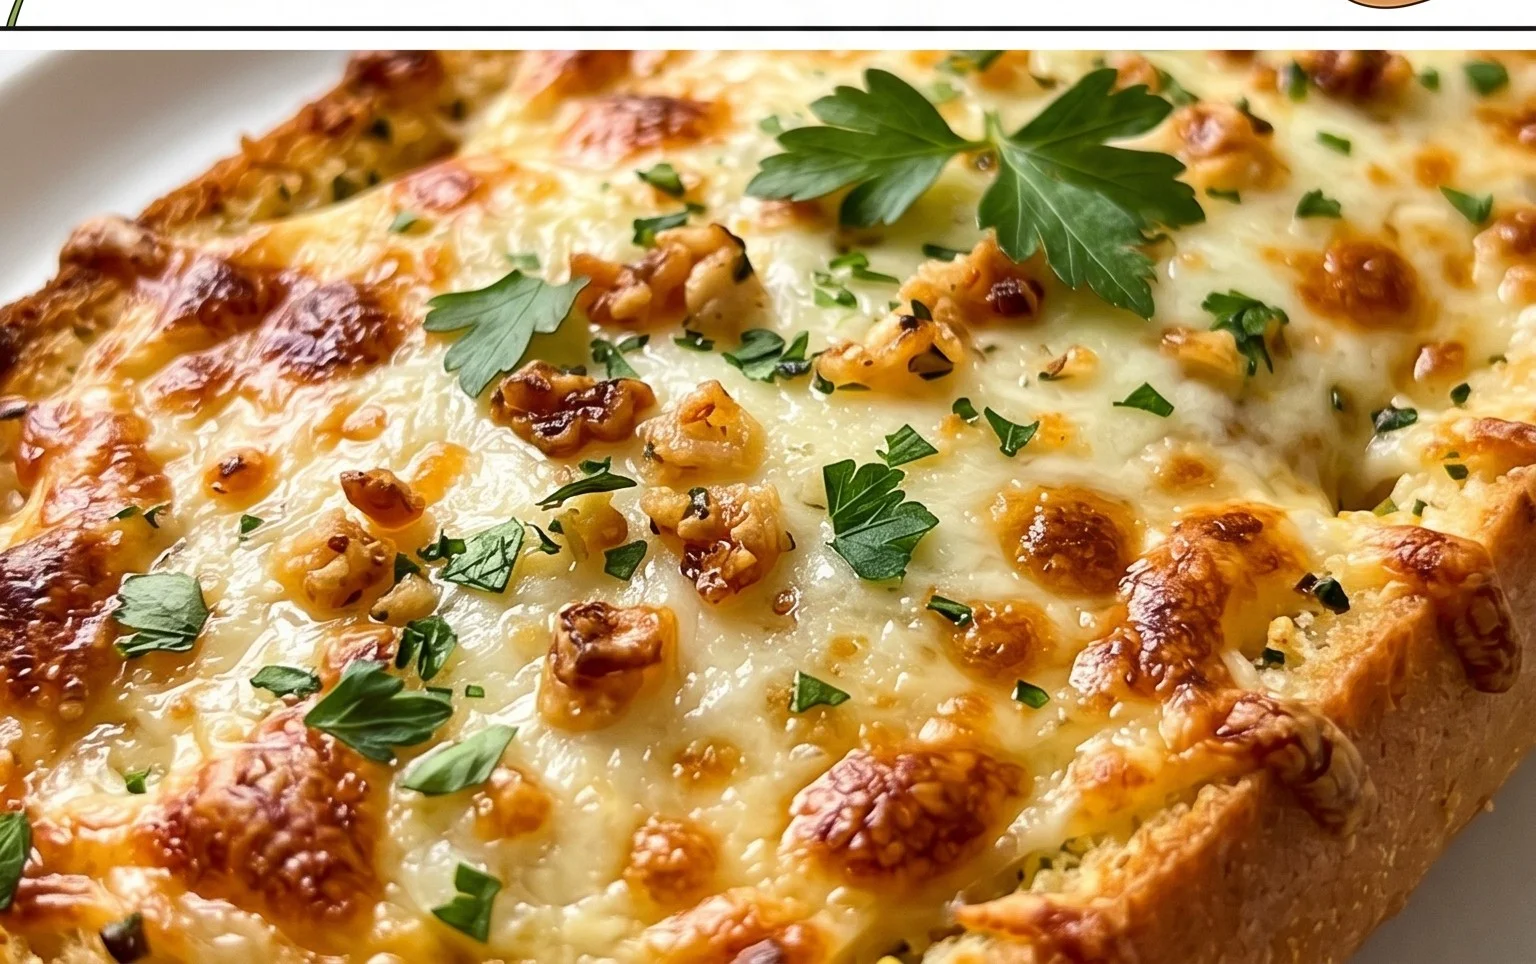
6. Bake Until Golden: Preheat your oven to 350°F (175°C). Place the assembled garlic bread sheet (on its origin extractal foil pan or a baking sheet) into the preheated oven. Bake for approximately 15-20 minutes, or until the cheese is melted, bubbly, and starting to turn golden brown, and the edges of the rolls are toasted to a delightful crisp. Keep a close eye on it during the last few minutes, as ovens can vary. You want that beautiful golden hue, but not burnt edges.
7. Rest and Serve: Once baked to perfection, carefully remove the cheesy garlic bread from the oven. Let it rest for a few minutes before slicing. This allows the cheese to set slightly and makes it easier to cut. Garnish with extra chopped parsley and a sprinkle of chili flakes if you like a little heat. Slice the sheet of rolls into individual servings and serve immediately. Prepare for amazed reactions! This cheesy garlic bread is more than just a side; it’s an experience. Enjoy every incredibly flavorful, cheesy bite!
Conclusion:
And there you have it – the ultimate guide to creating the BEST CHEESY GARLIC BREAD RECIPE! This recipe is a guaranteed crowd-pleaser, boasting a perfect balance of crispy crust, fluffy interior, and an irresistible cheesy garlic topping. The combination of fresh garlic, butter, and a generous blend of your favorite cheeses creates a flavor explosion that will have everyone beggin extractg for more. It’s incredibly simple to make, proving that deliciousness doesn’t have to be complicated. I truly encourage you to give this recipe a try; I’m confident it will become a staple in your kitchen!
This versatile side dish is perfect served alongside pasta, soups, salads, or as a standalone appetizer. Don’t be afraid to get creative with your cheese choices – a sharp cheddar, salty Parmesan, or even a touch of mozzarella can elevate it even further. For a spicier kick, consider adding a pinch of red pepper flakes to the garlic butter mixture. The possibilities are endless!
Frequently Asked Questions:
How can I make my cheesy garlic bread extra crispy?
For an extra crispy crust, ensure your oven is preheated to the correct temperature and consider toasting the bread lightly before adding the garlic butter and cheese. Baking on a preheated baking sheet or pizza stone can also contribute to a wonderfully crisp bottom.
Can I prepare this cheesy garlic bread ahead of time?
Yes! You can prepare the garlic butter and grate the cheese in advance. Store them separately in the refrigerator. When you’re ready to bake, spread the garlic butter on the bread and top generously with the cheese. This makes it super convenient for last-minute guests or weeknight meals.
What kind of bread is best for this recipe?
While a good quality baguette or Italian loaf works wonderfully, you can also use other types of bread like ciabatta, sourdough, or even thick-sliced white bread. The key is to use a bread that has a good structure to hold up to the toppings and baking process.
BEST CHEESY GARLIC BREAD RECIPE
The ultimate cheesy garlic bread recipe featuring a rich garlic butter spread and perfectly melted mozzarella.
Ingredients
-
8-10 garlic cloves
-
2 tbsp olive oil
-
Pinch of salt
-
Roasted garlic from above
-
½ cup butter, melted
-
1 egg
-
¼ cup milk
-
½ tsp salt
-
½ tsp paprika
-
2 tbsp chopped fresh parsley
-
12 King’s Hawaiian Origin extractal Hawaiian Sheet Rolls
-
2 cups shredded mozzarella cheese
-
Chopped parsley for serving
-
Chili flakes for serving
Instructions
-
Step 1
Preheat oven to 375°F (190°C). -
Step 2
In a small bowl, combine roasted garlic, melted butter, egg, milk, ½ tsp salt, paprika, and 2 tbsp chopped fresh parsley. Mix well. -
Step 3
Cut the sheet of King’s Hawaiian rolls horizontally about halfway through, creating a pocket for the garlic butter. If using a baguette, slice it lengthwise. -
Step 4
Pour the garlic butter mixture evenly over the cut rolls, ensuring it seeps into the crevices. -
Step 5
Sprinkle the shredded mozzarella cheese generously over the top of the rolls. -
Step 6
Bake for 15-20 minutes, or until the cheese is melted and bubbly and the bread is golden brown. -
Step 7
Remove from oven, sprinkle with additional chopped parsley and chili flakes if desired, slice, and serve immediately.
Important Information
Nutrition Facts (Per Serving)
It is important to consider this information as approximate and not to use it as definitive health advice.
Allergy Information
Please check ingredients for potential allergens and consult a health professional if in doubt.