Perfect Ramen Eggs Ajitama Recipe
Ramen eggs, also known as ajitama, are more than just a topping; they are a culinary revelation. These marinated soft-boiled eggs are the secret weapon to elevating your noodle soup from good to absolutely unforgettable. What is it about these glistening, jammy-yolked wonders that makes them so utterly craveable? It’s the perfect harmony of textures and flavors – the tender, almost custardy yolk contrasted with the slightly firm white, all infused with a savory, umami-rich marinade. Each bite of a perfectly prepared Ramen egg bursts with deliciousness, adding a depth and richness that transforms a simple bowl of ramen into a deeply satisfying experience. They’re incredibly addictive, and once you’ve tasted them, you’ll understand why they are a non-negotiable element for so many ramen enthusiasts. Get ready to unlock the magic of these delectable Ramen eggs!
Ramen Eggs (Ajitsuke Tamago)
There’s something incredibly satisfying about a perfectly cooked ramen egg, also known as ajitsuke tamago. The jammy, molten yolk, infused with a savory-sweet marinade, is the crowning glory of any ramen bowl. While they might seem intimidating to make at home, I promise you, with a little patience and the right technique, you can achieve ramen shop perfection in your own kitchen. This recipe breaks down the process into simple, manageable steps, ensuring you get those delightful ramen eggs every single time. They’re also fantastic as a snack on their own, sliced over rice, or even added to salads! Let’s get started on creating this umami-rich delicacy.
Ingredients:
Preparing the Eggs
The first and most crucial step to achieving perfect ajitsuke tamago is to nail the egg’s cooking time. We’re aiming for a jammy, custardy yolk that isn’t quite hard-boiled but also not completely runny. This usually means a shorter boiling time than you might be used to.
Step 1: Boiling the Eggs
To begin extract, gently place your 6 large eggs into a saucepan. I recommend using a saucepan that’s just large enough to hold the eggs in a single layer without them bumping into each other too much. This helps prevent cracking during the boiling process. Cover the eggs with cold water by about an inch. If you find your eggs are prone to cracking, adding a teaspoon of vinegar to the water can help coagulate the egg white quickly if it leaks, thus sealing the shell. Bring the water to a rolling boil over medium-high heat. Once it reaches a full boil, immediately reduce the heat to a gentle simmer. This is where the timing is critical: set a timer for exactly 6 minutes and 30 seconds for a perfectly jammy yolk. If you prefer a slightly firmer, but still gooey yolk, you can extend this to 7 minutes. For a fully hard-boiled yolk, you’d go longer, but that’s not what we’re aiming for here!
Step 2: The Ice Bath
As soon as your timer goes off, you need to shock the eggs to stop the cooking process instantly. Prepare a large bowl filled with ice and cold water. Carefully remove the eggs from the simmering water using a slotted spoon and immediately plunge them into the ice bath. Let them sit in the ice bath for at least 10-15 minutes. This not only stops the cooking but also makes them easier to peel, which is a welcome bonus. Don’t rush this step; a thorough chilling is key.
Crafting the Marinade
While the eggs are chilling, it’s time to prepare the flavorful marinade that will transform them into ajitsuke tamago. This marinade is a balance of salty, sweet, and umami, creating a depth of flavor that is simply irresistible.
Step 3: Combining the Marinade Ingredients
In a medium saucepan, combine the ½ cup of light sodium soy sauce, ¼ cup of water, ¼ cup of non-non-non-alcoholic alternativeic non-alcoholic mirin, and 2 tablespoons of granulated sugar. Stir these ingredients together well. Place the saucepan over medium heat and gently bring the mixture to a simmer, stirring occasionally, just until the sugar has completely dissolved. You don’t want this to boil vigorously, just a gentle simmer is enough to help the flavors meld. Once the sugar is dissolved and the mixture is warm, remove it from the heat. Let the marinade cool slightly before proceeding. It doesn’t need to be piping hot when the eggs go in.
Step 4: Marinating the Eggs
Once the eggs have cooled sufficiently in the ice bath and are comfortable to handle, it’s time to peel them. This is often the trickiest part, but with the ice bath shock, they should peel relatively easily. Gently tap each egg on a hard surface to crack the shell all over, then carefully peel them under cool running water. Some tiny bits of shell might stick, so take your time and be gentle to avoid damagin extractg the delicate egg white. Place the peeled eggs into a sealable bag or a small container that will fit them snugly. Pour the slightly cooled marinade over the peeled eggs, ensuring they are fully submerged. If they aren’t completely covered, you can gently tilt the container or bag to ensure even marination.
Step 5: The Waiting Game (and a little patience!)
This is where the magic happens, and it requires a bit of patience. Seal the bag or cover the container and place it in the refrigerator. For the best flavor, I recommend marinating the eggs for at least 6-8 hours, but 12-24 hours is even better. The longer they marinate, the more deeply the flavors will penetrate the egg white and the yolk. You can flip the bag or gently stir the eggs halfway through the marinating process to ensure even coloring and flavor distribution. The egg whites will take on a beautiful amber hue from the soy sauce. When you’re ready to serve, carefully remove the eggs from the marinade. You can discard the marinade or save it for another use (though it’s best to use it within a few days).
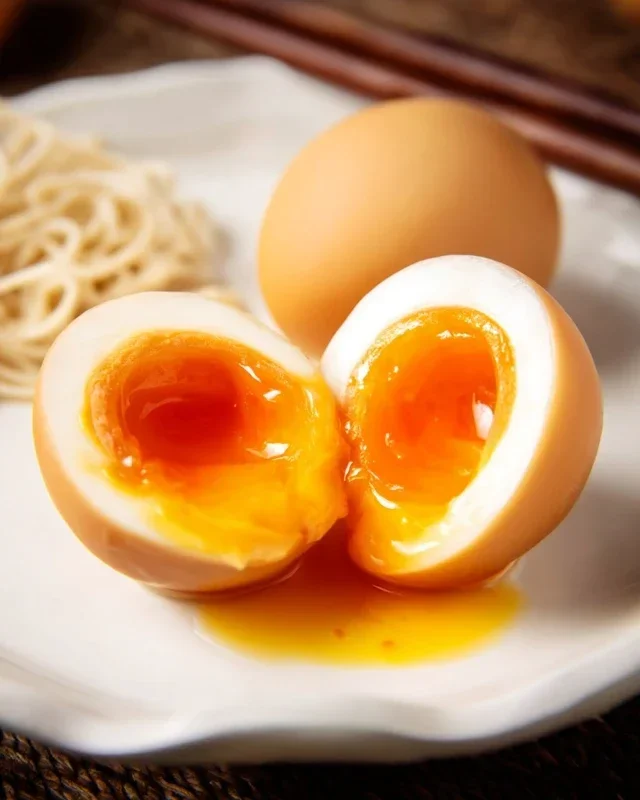
Enjoy your homemade ramen eggs! Slice them in half to reveal that glorious jammy yolk and add them to your favorite ramen, or enjoy them however you please. They are truly a game-changer!

Conclusion:
And there you have it – your guide to making perfect Ramen Eggs, or Ajitama! This seemingly simple recipe unlocks a world of flavor and texture that elevates any dish. The magic lies in the delicate balance of the savory marinade, the creamy, jammy yolk, and the tender, slightly firm egg white. These are so much more than just boiled eggs; they’re a culinary upgrade, adding depth and a burst of umami that’s truly irresistible. I’m confident you’ll find this recipe incredibly rewarding and surprisingly easy to master.
I encourage you to give these Ramen Eggs a try. They are fantastic not just in ramen, but also sliced over rice bowls, tucked into sandwiches, or even as a sophisticated appetizer. Don’t be afraid to experiment with the marinade – a touch of non-alcoholic mirin for sweetness, a splash of non-alcoholic sake for depth, or even a pinch of chili flakes for a hint of heat can all create delicious variations. Get creative and make them your own!
Frequently Asked Questions:
Q: How long do Ramen Eggs last in the refrigerator?
A: Once marinated, your Ramen Eggs can be stored in an airtight container in the refrigerator for up to 4-5 days. The marinade helps to preserve them, but they are best enjoyed within the first few days for optimal texture and flavor.
Q: Can I make the marinade ahead of time?
A: Absolutely! The marinade can be made a day or two in advance and stored in the refrigerator. This can actually be beneficial as it allows the flavors to meld together even further before you add your cooked eggs.
Q: My yolks aren’t jammy enough. What did I do wrong?
A: The key to a jammy yolk is precise egg boiling time. For a jammy yolk, aim for 6-7 minutes of boiling time for large eggs, followed by an immediate ice bath to stop the cooking process. If your yolks are too runny, try boiling for an extra minute. If they are hard, reduce the boiling time slightly next time.
Ramen Eggs (Ajitama)
Perfectly marinated soft-boiled eggs, essential for any ramen dish. They boast a custardy yolk and savory, umami-rich flavor.
Ingredients
-
6 large eggs
-
1/2 cup soy sauce (light sodium)
-
1/4 cup water
-
1/4 cup non-alcoholic mirin
-
2 tablespoons granulated sugar
-
Vinegar (optional for boiling eggs)
Instructions
-
Step 1
Gently place eggs in a pot and cover with cold water, adding a splash of vinegar if using. Bring to a rolling boil over medium-high heat. -
Step 2
Once boiling, immediately reduce heat to low and simmer for exactly 6 minutes for a soft, jammy yolk. Adjust time for desired doneness. -
Step 3
Prepare an ice bath. Transfer cooked eggs to the ice bath to stop the cooking process. Let them cool for at least 10 minutes. -
Step 4
While eggs cool, combine soy sauce, water, non-alcoholic mirin, and granulated sugar in a resealable bag or shallow container. Stir until sugar is dissolved. -
Step 5
Carefully peel the cooled eggs and place them into the marinade. Ensure they are fully submerged. -
Step 6
Marinate eggs in the refrigerator for at least 4 hours, or preferably overnight, for maximum flavor absorption. Flip eggs halfway through for even marination.
Important Information
Nutrition Facts (Per Serving)
It is important to consider this information as approximate and not to use it as definitive health advice.
Allergy Information
Please check ingredients for potential allergens and consult a health professional if in doubt.